We are open by appointment Monday to Friday from 9am to 5pm. To schedule an appointment, please email your request to asc@torontomu.ca or fill out our appointment form .
This year (2018) marks a special Anniversary at Ryerson University – a double anniversary. It has been 70 years since the founding of the school and 25 years since it achieved University status.
In conjunction with University wide celebrations, The Ryerson University Archives has created an exhibit, running June 1 – October 31, looking back at the history of the school. For each month the exhibit is open we will feature in our blog one of the 5 themes of the exhibit: 5 pivotal moments in Ryerson’s history, Student Groups and Clubs, Student Government, Student Housing, and Athletics and Intramurals.
For June’s blog – we will look at some key moments in the University’s history.
Five Pivotal Moments in Ryerson’s History
Moment #1 Open for Business
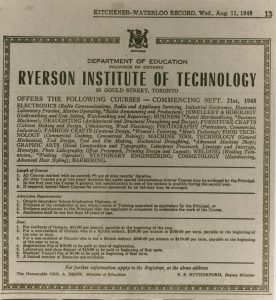
In August of 1948 the Ryerson Institute of Technology was founded “as an experiment in post-secondary education and an alternative to the traditional apprenticeship system”. With only two weeks to advertise – Ryerson opened in September of 1948 with an enrollment of 210 students, each paying just $25 tuition.
Advertisement on page 13 of the August 11, 1948 edition of the Kitchener-Waterloo Record newspaper.
Moment #2 RIT to RPI
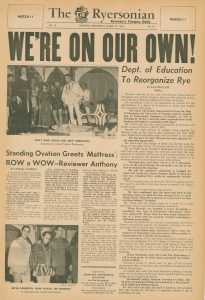
On April 26, 1963 “An Act Respecting Ryerson Polytechnical Institute” was formally declared by the Lieutenant Governor of Ontario. Along with the change it name from Ryerson Institute of Technology to Ryerson Polytechnical Institute, the school became independent of the various governmental bodies that controlled it and would now be regulated by a Board of Governors.
Front page of the March 16, 1963 edition of The Ryersonian, the Ryerson student newspaper.
Moment #3 A Question of Degrees
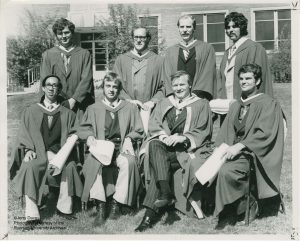
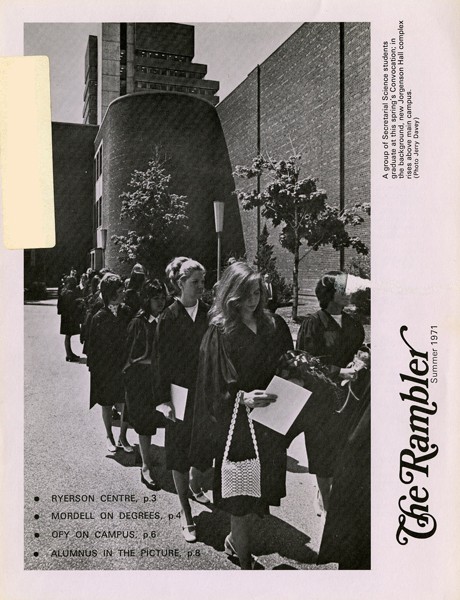
In 1971 Bill 97 was passed in the Ontario Legislature enabling Ryerson Polytechnical Institute the ability to grant degrees. The first 9 degrees, in Interior Design, Business Management, and Geodetic Sciences, were handed out at the May 26, 1972 convocation ceremony. Ontario Premier Bill Davis received an “honourary” Bachelor of Technology in Public Administration at the ceremony.
Photograph of 7 of the 9 first Ryerson students to receive degrees. Premier William Davis is seated second from right. (RG 4.96, Photographer: Jerry Davey)
Moment #4 RPI to RPU
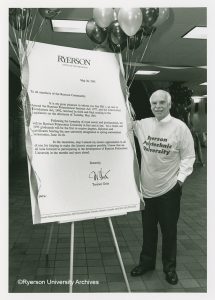
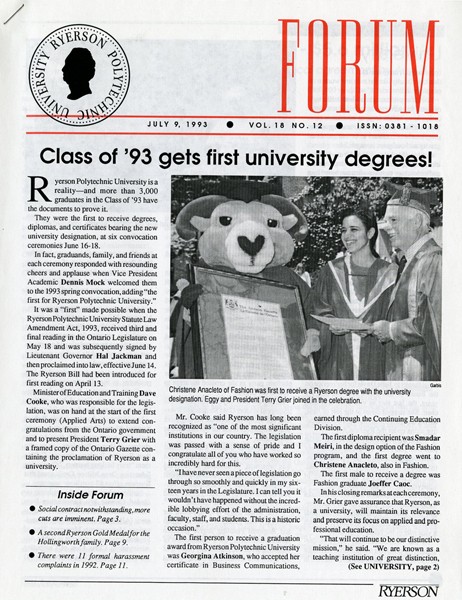
On May 27, 1991 the Ryerson Board of Governors and Academic Council (Senate) gave their support to the proposal the the school seek full university status. Two years later on June 1, 1993 the dream was realized when Ryerson Polytechnic University was recognized by Royal Assent.
Ryerson President Terry Grier celebrating University status. (RG 76.14.723)
Moment #5 RPU to RU
In 2000, seven years after achieving university status, Ryerson opts to change its name to Ryerson University – with its formal name remaining Ryerson Polytechnical University. Two years later on June 27, 2002 the name is formally recognized by the government and changed to Ryerson University.
Signage outside of the Ryerson University bookstore and parking garage. (Archives Digital Content)
There are many more pivotal and significant moments throughout our 70 year history – so many that they would not all fit in this blog, but if you would like to learn more about them – please visit the Archives and Special Collections located on the 4th floor of the library in Room LIB404. You can also take a look at the University’s anniversary page here.
Stay tuned for next month’s entry when we look at student clubs and groups.
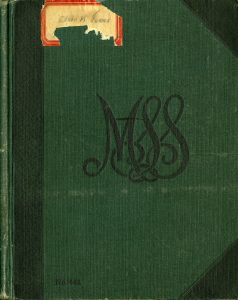
The Wellesley Hospital School of Nursing Alumnae Association fonds came to the Ryerson Archives and Special Collections in 2011. In it are several notebooks filled with course notes, and practical knowledge for the student nurse.
One of the notebooks dates to the 1920’s and belonged to Wellesley School of Nursing class of 1925 graduate Elsie Kathleen Jones. Elsie K. returned to The Wellesley in 1928 and became the Director of Nursing in 1937, the role she held until her retirement in 1964.
In the notebook there are notations regarding everything from making a proper hospital bed and caring for the sheets, to recognizing and treating a hemorrhage in a patient. The following are some excerpts from the notebook.
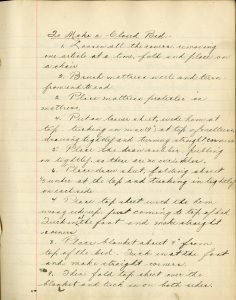
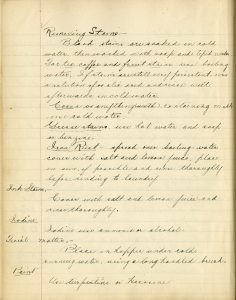
To Make a Closed Bed
Loosen all the covers, removing one article at a time. Fold and place on a chair
Brush mattress well and turn from end to end
Place mattress protector on mattress
Put on lower sheet, wide hem at top, tucking in nine (9”) at top of mattress drawing tightly and turning straight corners.
Place the draw rubber, pulling on tightly, so there are no wrinkles
Place draw sheet, folding about 1/3 under at the top and tucking in tightly on each side
Place top sheet with the hem wrong side up, first coming to top of bed. Tuck in at the foot and make straight corners
Place blanket about 9” from top of the bed. Tuck in at the foot and make straight corners.
Then fold top sheet over the blanket and tuck in on both sides
Place the spread, reaching to the top of the bed, making straight corner at the bottom.
Place two pillows in bed. See that the pillows are well on the corners of the slips. Fold and place with closed end toward the door
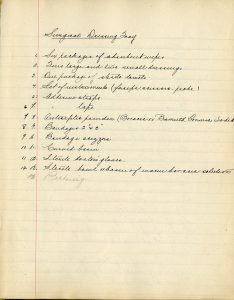
The notebook also included instructions on how to make an “Ether” or surgical bed. The following are instructions for making up a surgical tray:
Surgical dressing tray
Six packages of absorbent wipes
Two large and two small dressings
One package of sterile towels
Set of instruments (forceps, scissors, probe)
Adhesive straps
Adhesive tape
Antiseptic powder (Borace or Bismuth Formic Iodide)
Bandages 2” x 3”
Bandage scissors
Curved basin
Sterile doctor’s gloves
Sterile bowl or basin of warm boracic solution
Packing
The nurses were also responsible to pre-treating the bedding if stained before sending them out to be washed:
Blood stains are soaked in cold water, then washed with soap and tepid water. For tea, coffee, and fruit stains use boiling water. If stains are still very persistent, use a solution of oxalic acid and rinse well afterwards in cold water.
Cocoa or anything containing milk use cold water
Grease stains, use hot water and soap or benzene
Iron Rust – spread over boiling water cover with salt and lemon juice, place in sun, if possible, and rinse thoroughly before sending to laundry
Ink stains – cover with salt and lemon juice and rinse thoroughly
Iodine – use ammonia or alcohol
When it came to treating their patients there were basic instructions such as recognizing sings of and type of fevers and proper care of thermometers:
Care of thermometer
Keep thermometer in bichloride of mercury solution 1-1000. Wash in cold water and dry before giving to patient
Types of Fever
Continuous fever which remains high with slight variations
Remittent, which remain above normal with considerable variations between highest and lowest temperature
Intermittent – alternately rises to high fever and falls to or below normal
Keep thermometer in bichloride of mercury solution 1-1000. Wash in cold water and dry before giving to patient
The notebook also has a number of recipes for poultices, enemas, purgatives, and various medical solutions used by nurses to treat a variety of medical conditions. The Linseed poultice was used for treating chest congestion and pneumonia:
Linseed Poultice
Is made from linseed or ground flax seed meal. It is most effectual because it can be used at higher temperatures with blistering, as the linseed contains considerable oil.
Preparation
For a small poultice, use about 2/3 cup of linseed to 1 cup boiling water. Add the linseed slowly to the boiling water, stirring constantly with a wooden spoon or spatula. Turn the gas low and just let come to a boil. Remove from gas and beat vigorously. Spread the linseed about 3/4” thick on poultice gauze leaving a good margin for folding in. Carry to the patient between heated plates. Have ready oiled muslin flannel protector binder and pins
*Note – Linseed poultice must be hot, light and smooth.
To view the notebook in its entirety or look through other items in this fonds – please contact Ryerson Archives and Special Collections at asc@ryerson.ca
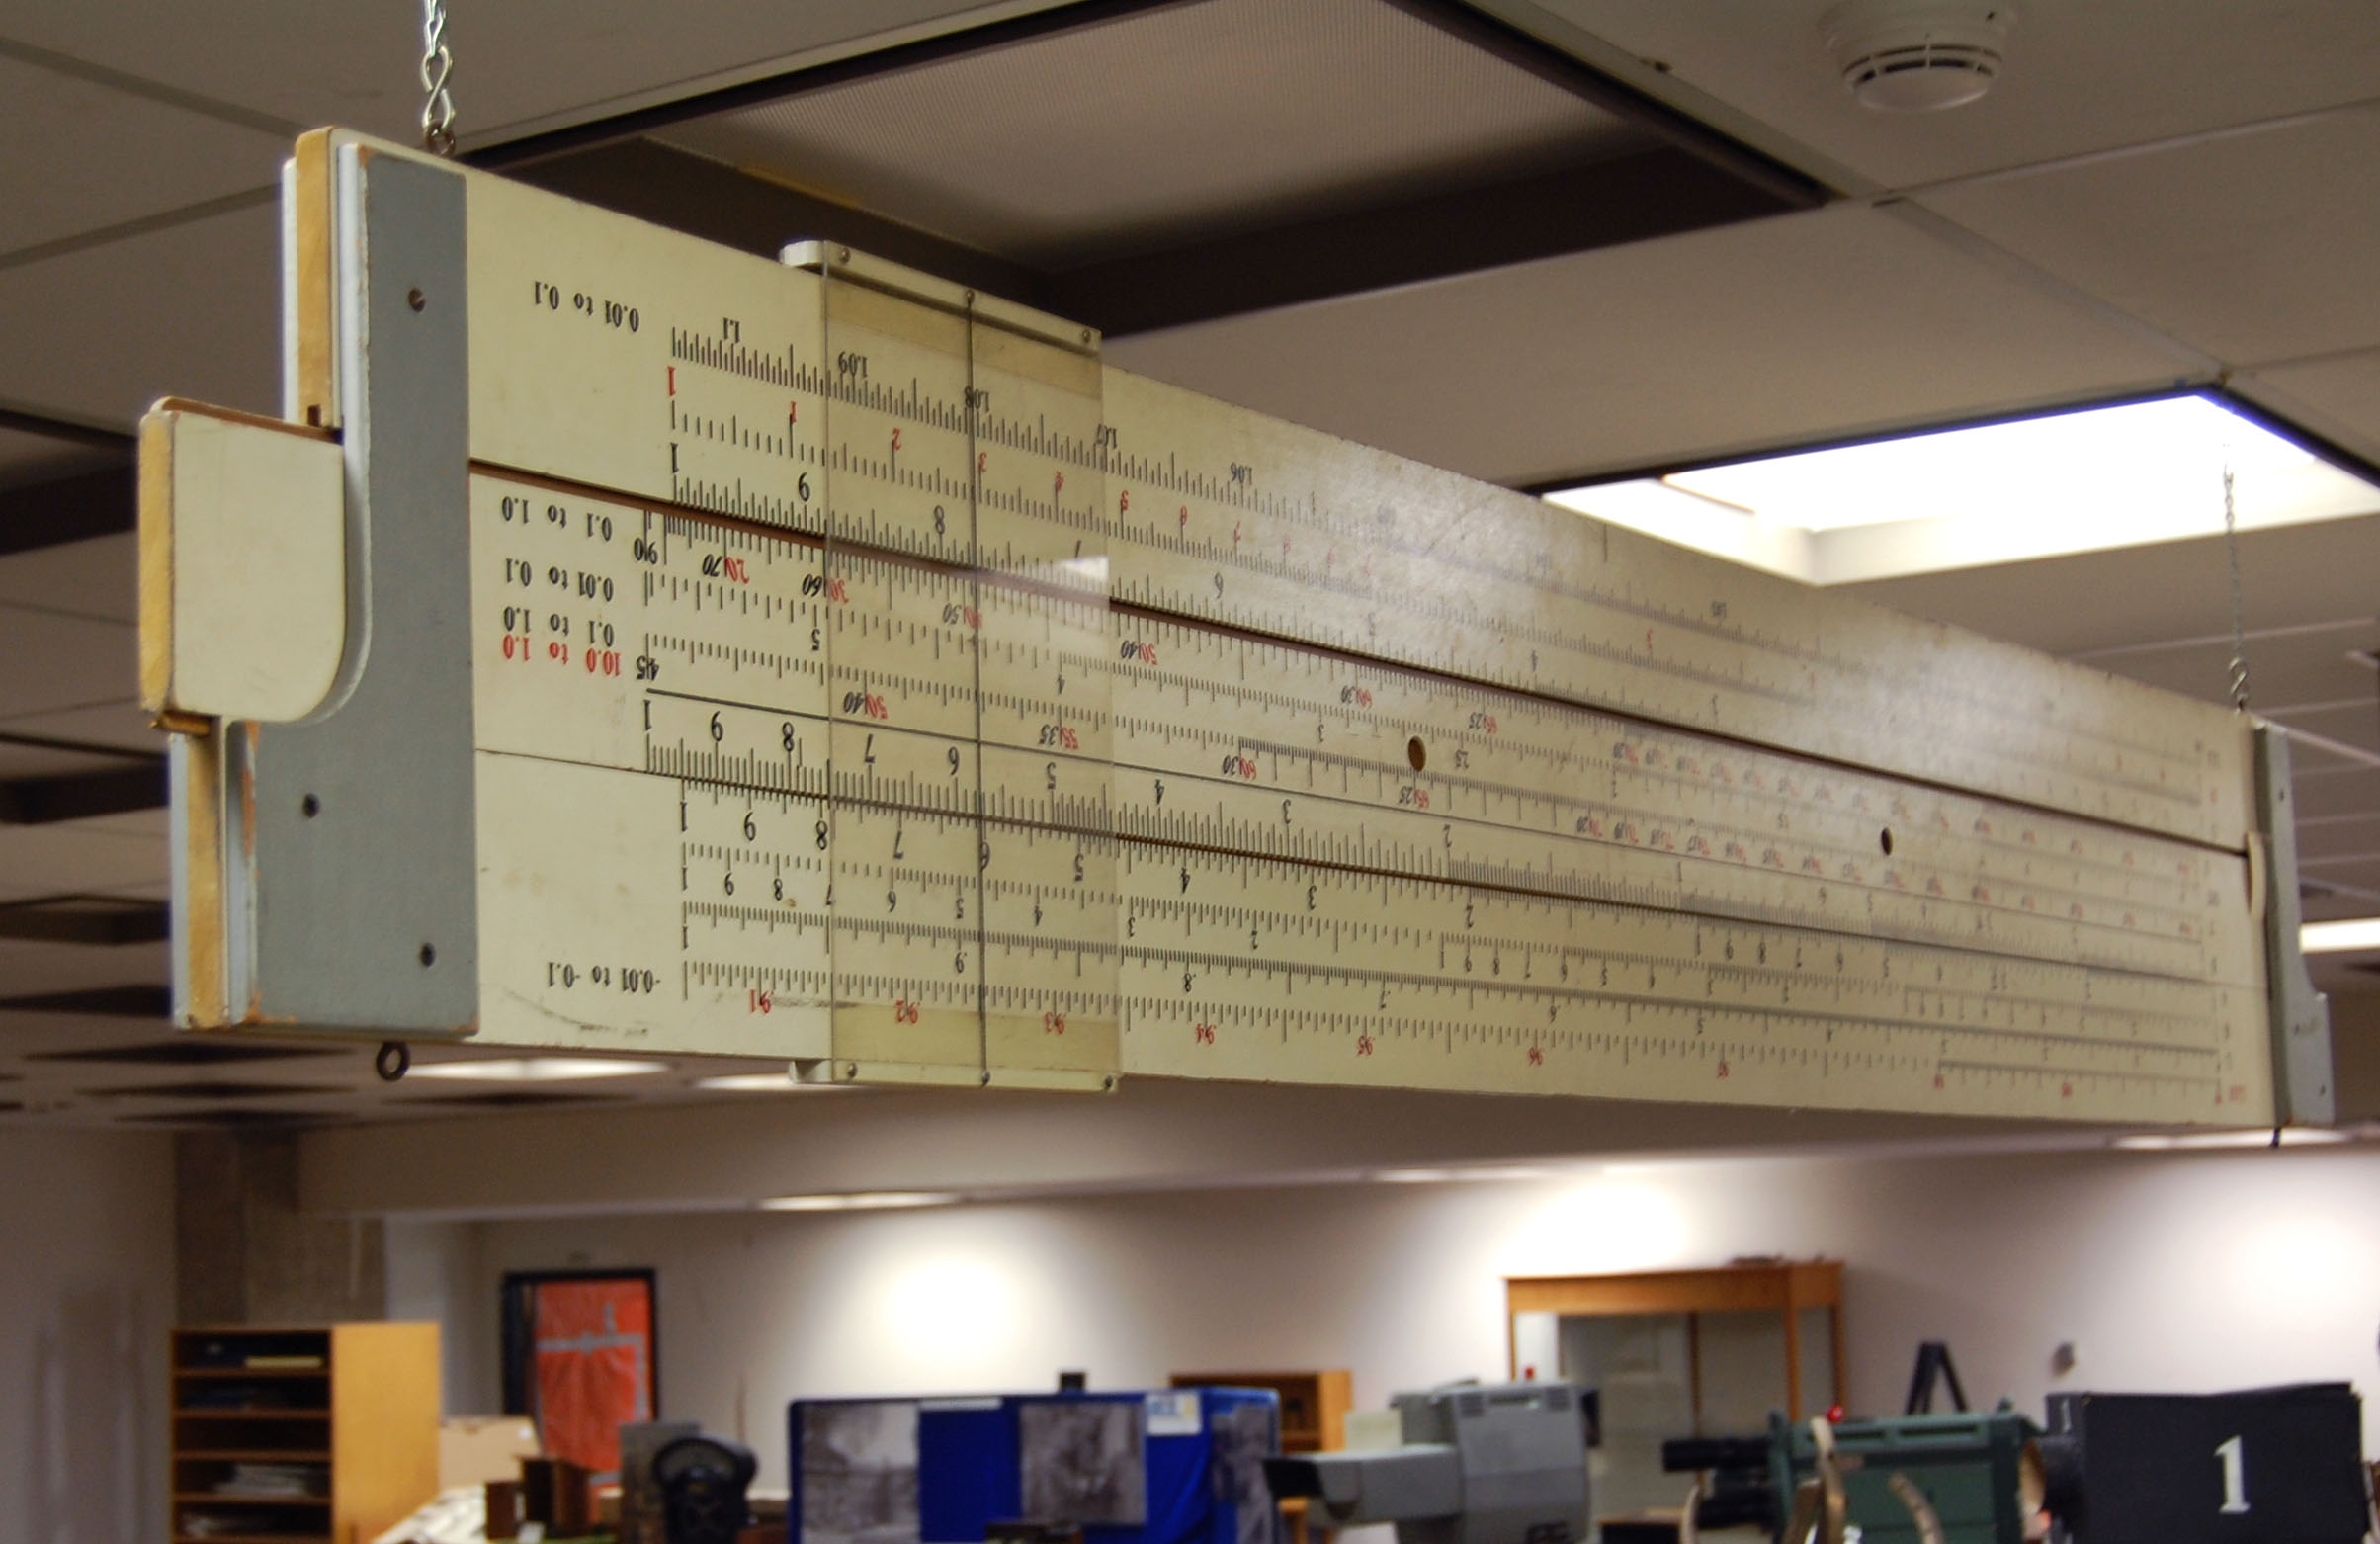
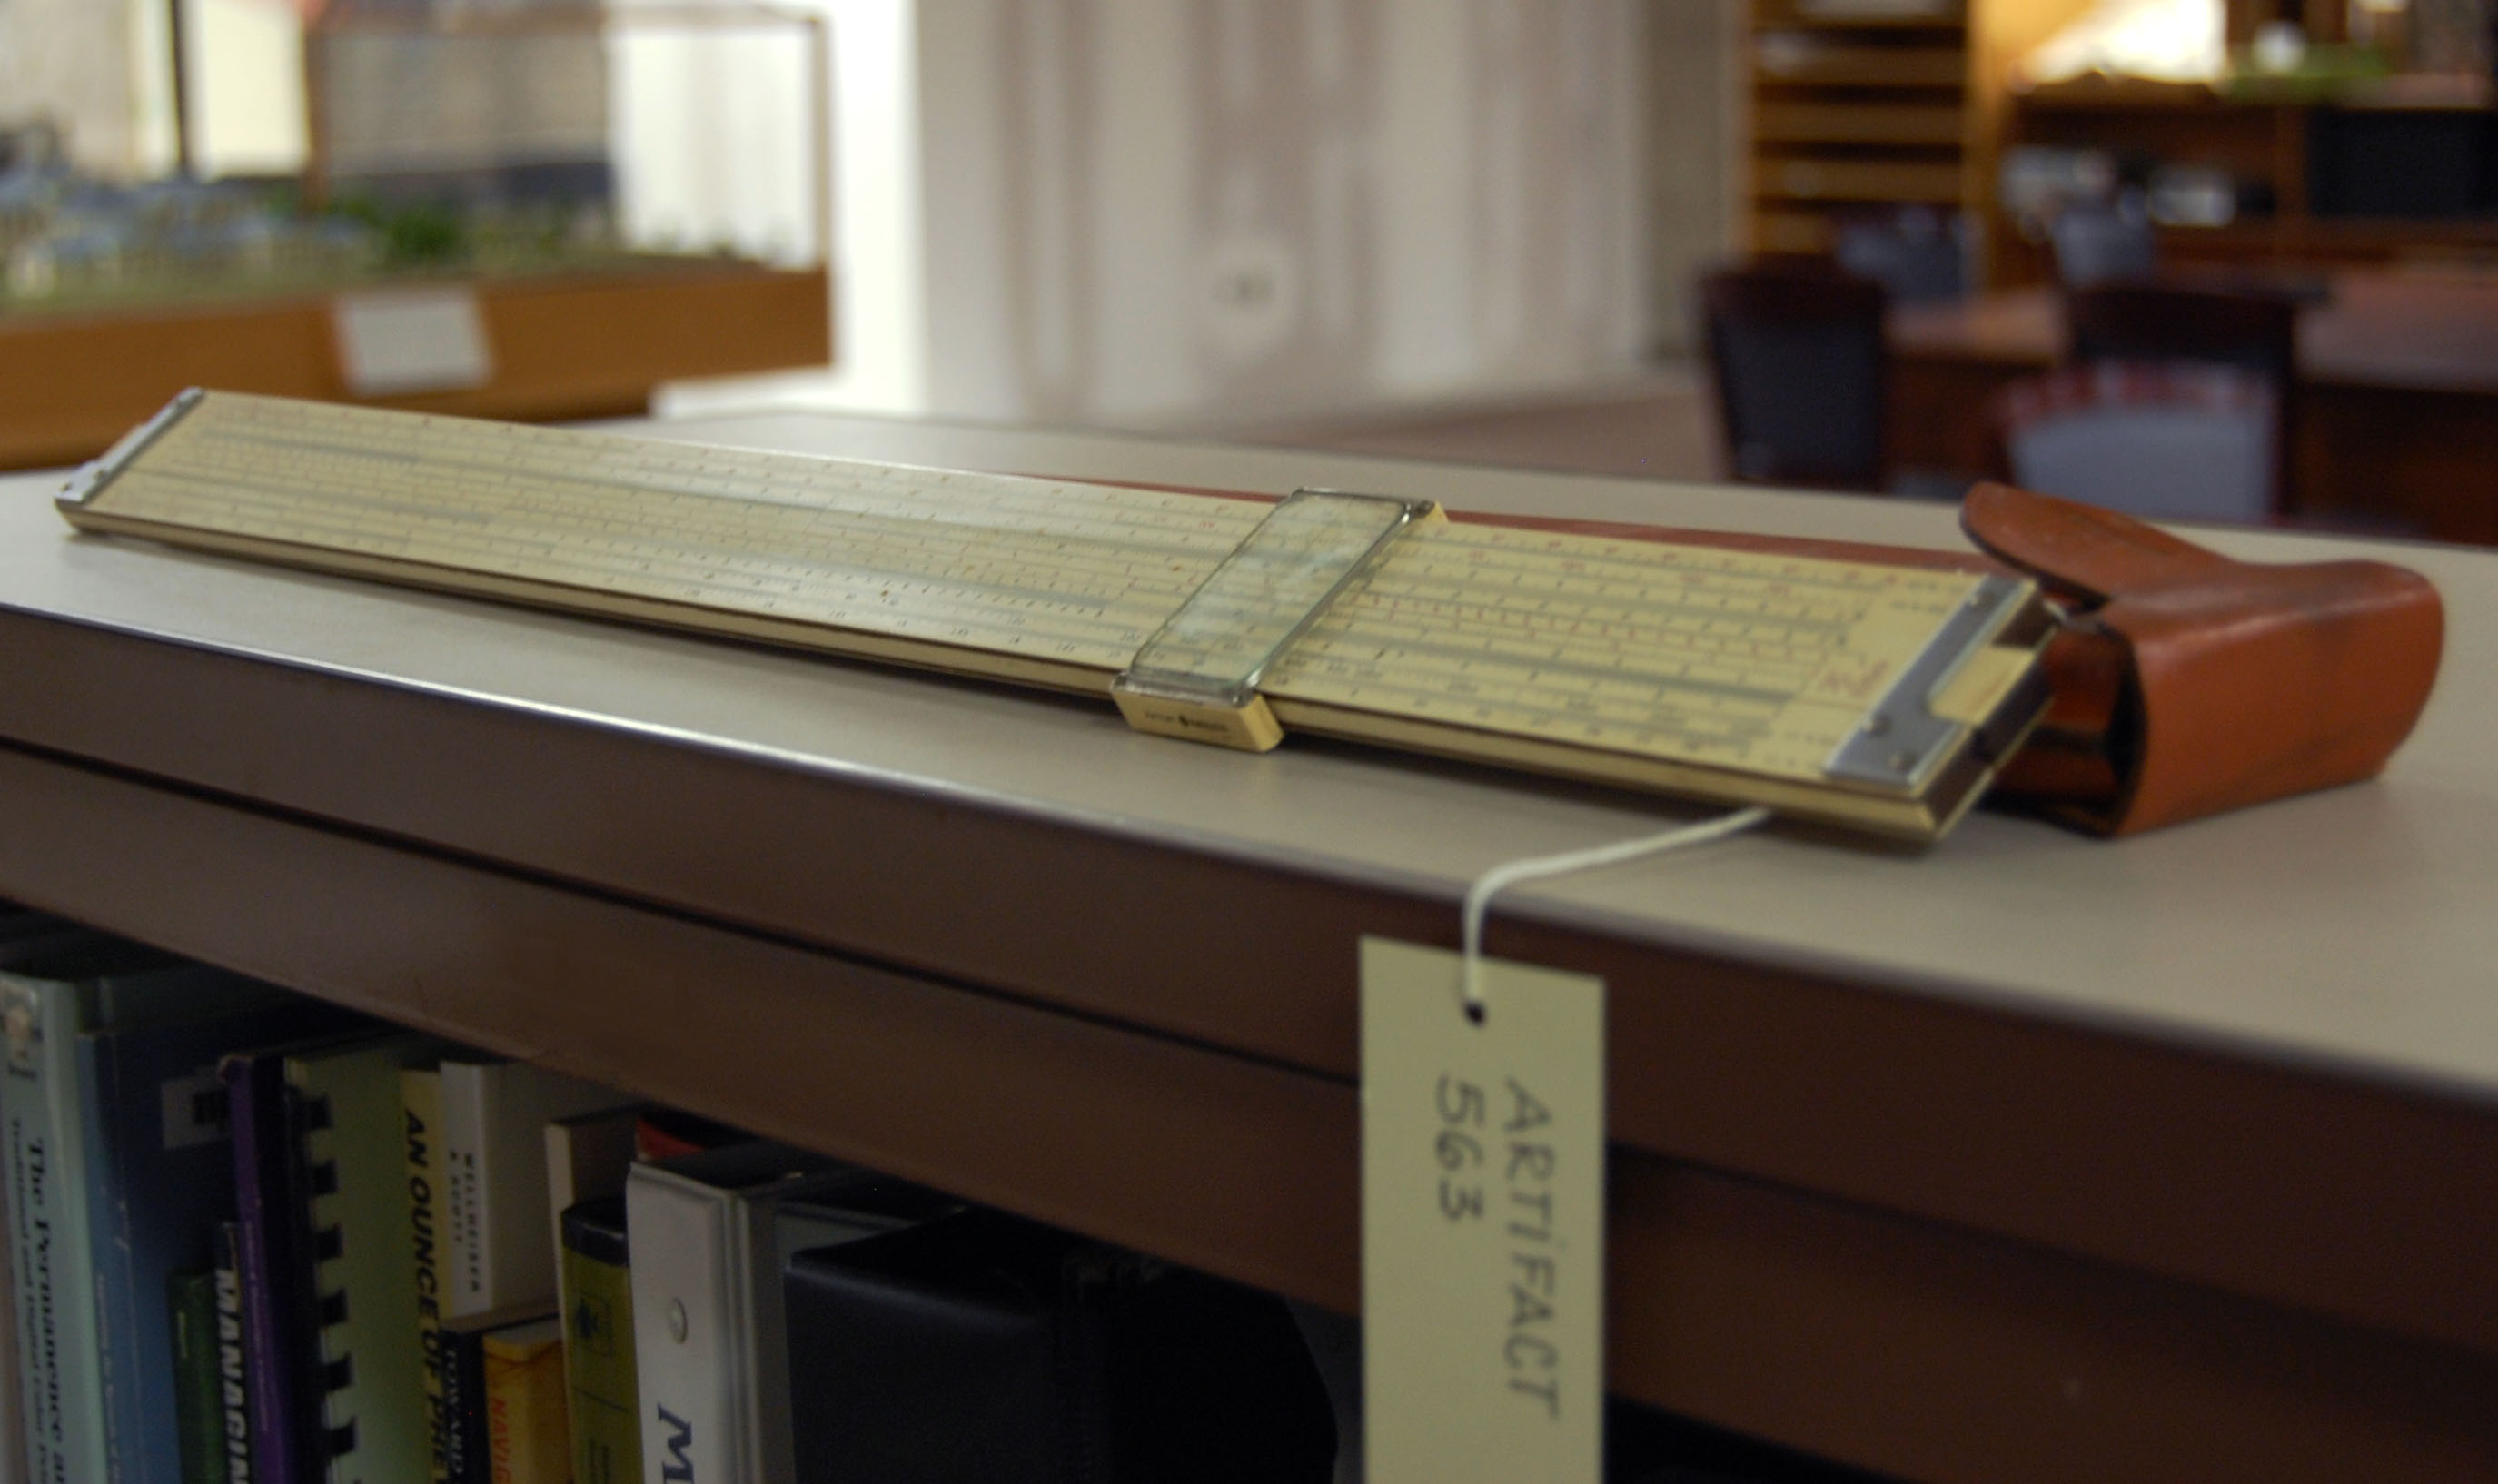
One of the Archives longest artifacts (when fully extended it reaches 18 feet), this model slide rule was donated by the Mathematics, Physics, and Computer Science Department. It was used for demonstration purposes in the classroom. It served as a useful visual aide by instructors who would need to explain concepts on the chalk board to a classroom of students. The students could then follow along with their respective slide rules.
The slide rule was developed in the 17th century and was used for calculations in science and engineering before the advent of the pocket calculator.
Donald Mordell, Ryerson’s President from 1970-1974, also donated his personal slide rule and case. He was a distinguished international engineer and academic.
For the month of August, Archives and Special Collections will blog bi-weekly with points of interest from our collections.
This week we look at documents connected to the birth of the Archives at Ryerson.
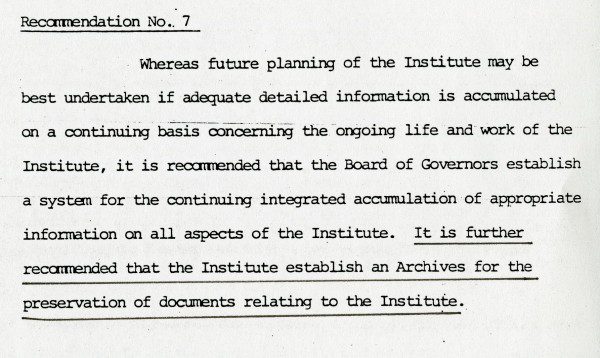
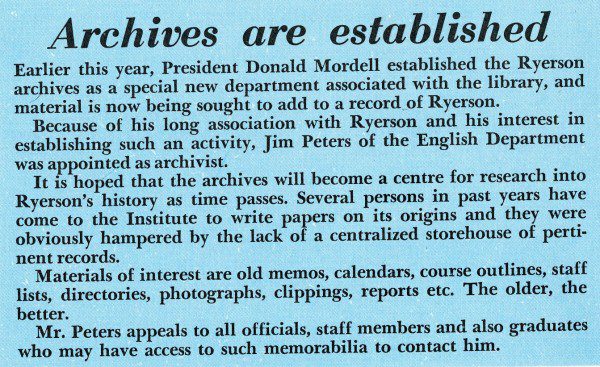
In 1970 Ryerson Polytechnical Institute invited Professor D. McCormack Smyth to conduct a study of the structure of government at Ryerson. The Smyth Commission Report was published and its 7th recommendation was the creation of an institutional Archives.
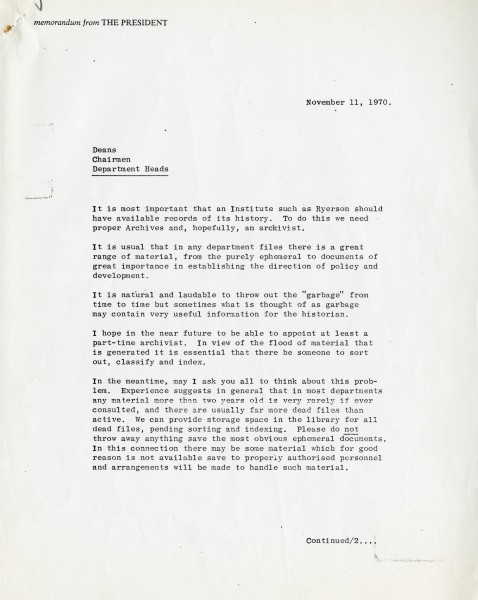
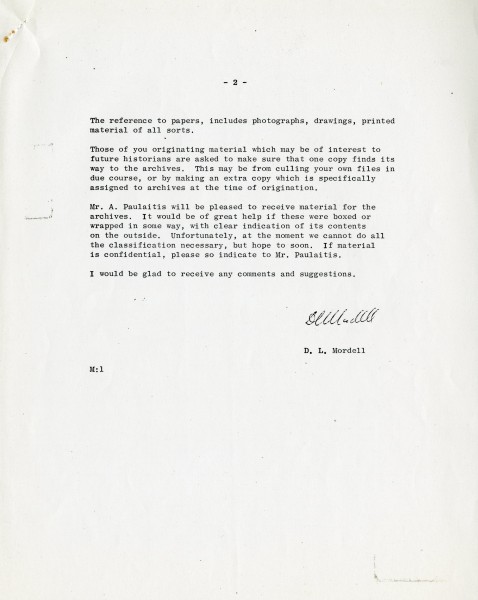
On November 11, 1970 Ryerson President Donald Mordell sent out the following memo to all Deans, Chairmen, and Department heads.
November 11, 1970 memorandum
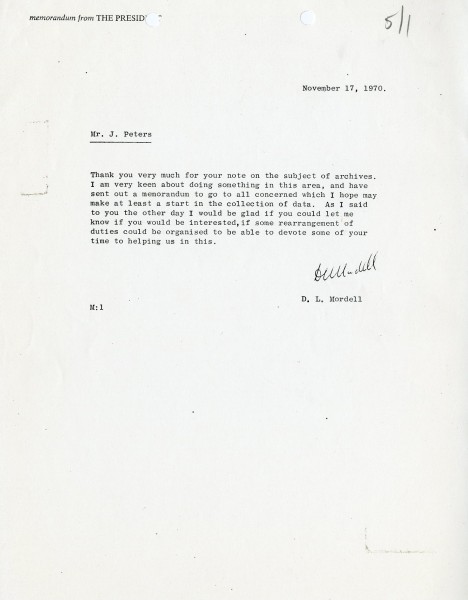
On November 17, 1970 Mordell sent the following memo to Jim Peters, a professor in the Department of English:
Memo from Donald Mordell to Jim Peters
The Archives was officially established in 1971 as a special new department associated with the Library. Jim Peters was appointed Ryerson’s first Archivist.
Over the past twenty years with the transition into a digital world, the way we collect, view and capture photographs has changed. Gone are the days when each of our snapshots took a physical form and held value in the time and money it took to create it. With digital technology offering high quality images with the use of a cell phone, and the cost of storing those images continuously decreasing, the decision to make and keep an expansive collection takes little deliberation. For those of us who were around to watch the transition from analogue to digital photography formats, we can still remember the days when that push of a button created a real object that held our memories and could be kept as a souvenir for the years to come. So how do we care for and ensure the longevity of our shoe-boxes and albums of prints combined with our hard drive of digital images?
If your photograph collection looks like this, you should probably read this blog post.
Digitization
Analogue photographs, whether developed in a drug store or printed in a dark room, are far from permanent. In fact, if your photo collection is anything like mine, the majority of those photographs are probably colour 4×6, Polaroid, or photo paper print. These colour prints are actually at a higher risk of fading than your great grandmother’s old silver gelatin black and white prints. In fact, if you go take a look, they are probably far from the way they looked when you got them already. This is why, if you want those pictures of you as a kid or your wedding day to be around for your grandchildren and great grandchildren, your best option is to re-capture them digitally.
Digitization doesn’t have to be expensive, but it can be time consuming. Deciding to digitize is the first step, but depending on time, technical know-how, digital storage capacity and available equipment, executing your digitization plan can take a variety of forms.
Scanning
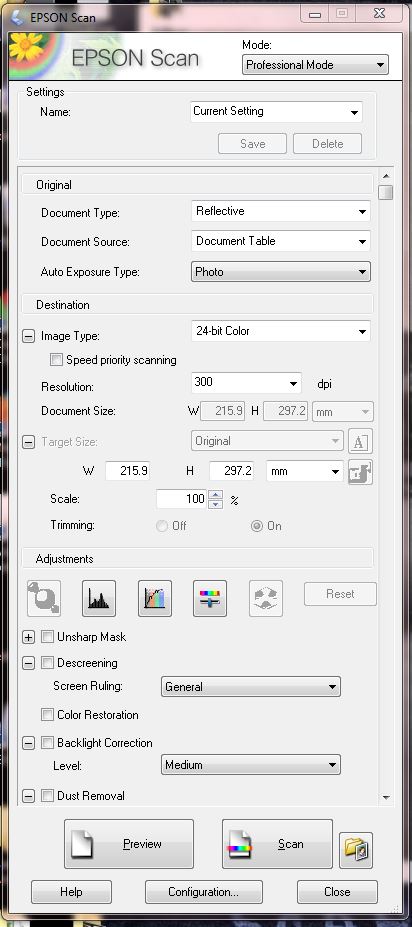
Ideally, for long-term preservation, scanning is the way to go. A good scanner can provide you with high quality images that will allow you to view, print and display your family photos however you choose. Depending on the type of photographs you have (especially if there are negatives or slides in your collection), you may need a scanner capable of transparency scanning. A good scanner goes up in price pretty quickly, but there are other options. For instance, the Toronto Public Library has Digital Design Workstations equipped with Epson scanners that can be reserved for two hours at a time to help get you through that shoebox or two in your closet. Software such as PhotoShop, EPSON Scan in professional mode, or SilverFast will provide you with all the settings you need and usually come with the purchase of a scanner.
Essentially, the settings you will be looking for include things like Document Type, Image Type, Resolution and Image Format. Features such as batch scanning that speed up the process by allowing you to select and scan more than one photograph at a time are also something to look for. Generally, the auto settings of the scanner should work fine, but you will want to ensure a resolution of at least 300 dpi/ppi with 24-bit colour RGB depth and that you are saving in TIFF or JPEG format. Make sure you are working with a clean scanner and have dusted off your photographs to prevent it from appearing in your digital image and avoid timely editing later on.
If you are really concerned about capturing the colours of your photograph as accurately as possible, the FADGI Guidelines for Digitizing Cultural Heritage Materials reviews how to scan a photograph for conservation and long-term preservation, and cover topics such as using a colour reference target, preparing your viewing environment, monitor calibration, spatial and signal resolution, colour gamut, colour mode, colour space. Generally, for heritage preservation the recommended pixel array is 4000 pixels along the longest dimension of your photograph. So if you are scanning a 4 x 6 inch print, your spatial resolution should be set to (4000 ppi ÷ 6” =) 600 dpi/ppi.
Re-photographing
If a scanner is out of your budget, and your local library doesn’t have scanners for public use, you might want to consider the option of re-capturing your photographs in a digital format. This can also be as simple or complex as you decide to make it.
Just as easily as your cell phone helps you capture everyday moments, it can also help you digitize your family photograph collection. Although there are apps like CamScanner, that can help edit a poorly captured reproduction, use these as a last resort or when time is limited, as they will likely provide you with low quality and slightly distorted images. Whether using your cell phone camera, a digital point-and-shoot, or a professional digital camera, here are some things to think about before creating a digital version by re-photographing that old family photo:
If the size of your original photograph is information you find valuable in its preservation, include a ruler or other measurement scale in your image.
Other information about the photograph, such as geographical location where the image was taken, or the names of its subjects, that you do not want to lose can also be included in the frame of your new image.
Place photograph on a solid grey background, use an easel or copystand if available.
Use a tripod (and a release cord if possible) or other steadying device to prevent blur from occurring in your digital images.
Line up the frame of your digital image with the frame of the photograph.
Try to ensure each corner of the original photograph appears as a right angle in your viewfinder to prevent distorted imaging.
Be aware of light and shadows. Optimally you will want to set up two lights, the same height and distance away and on either side of the photograph to ensure even illumination.
Additional light sources can help prevent shadows caused by curling or frames.
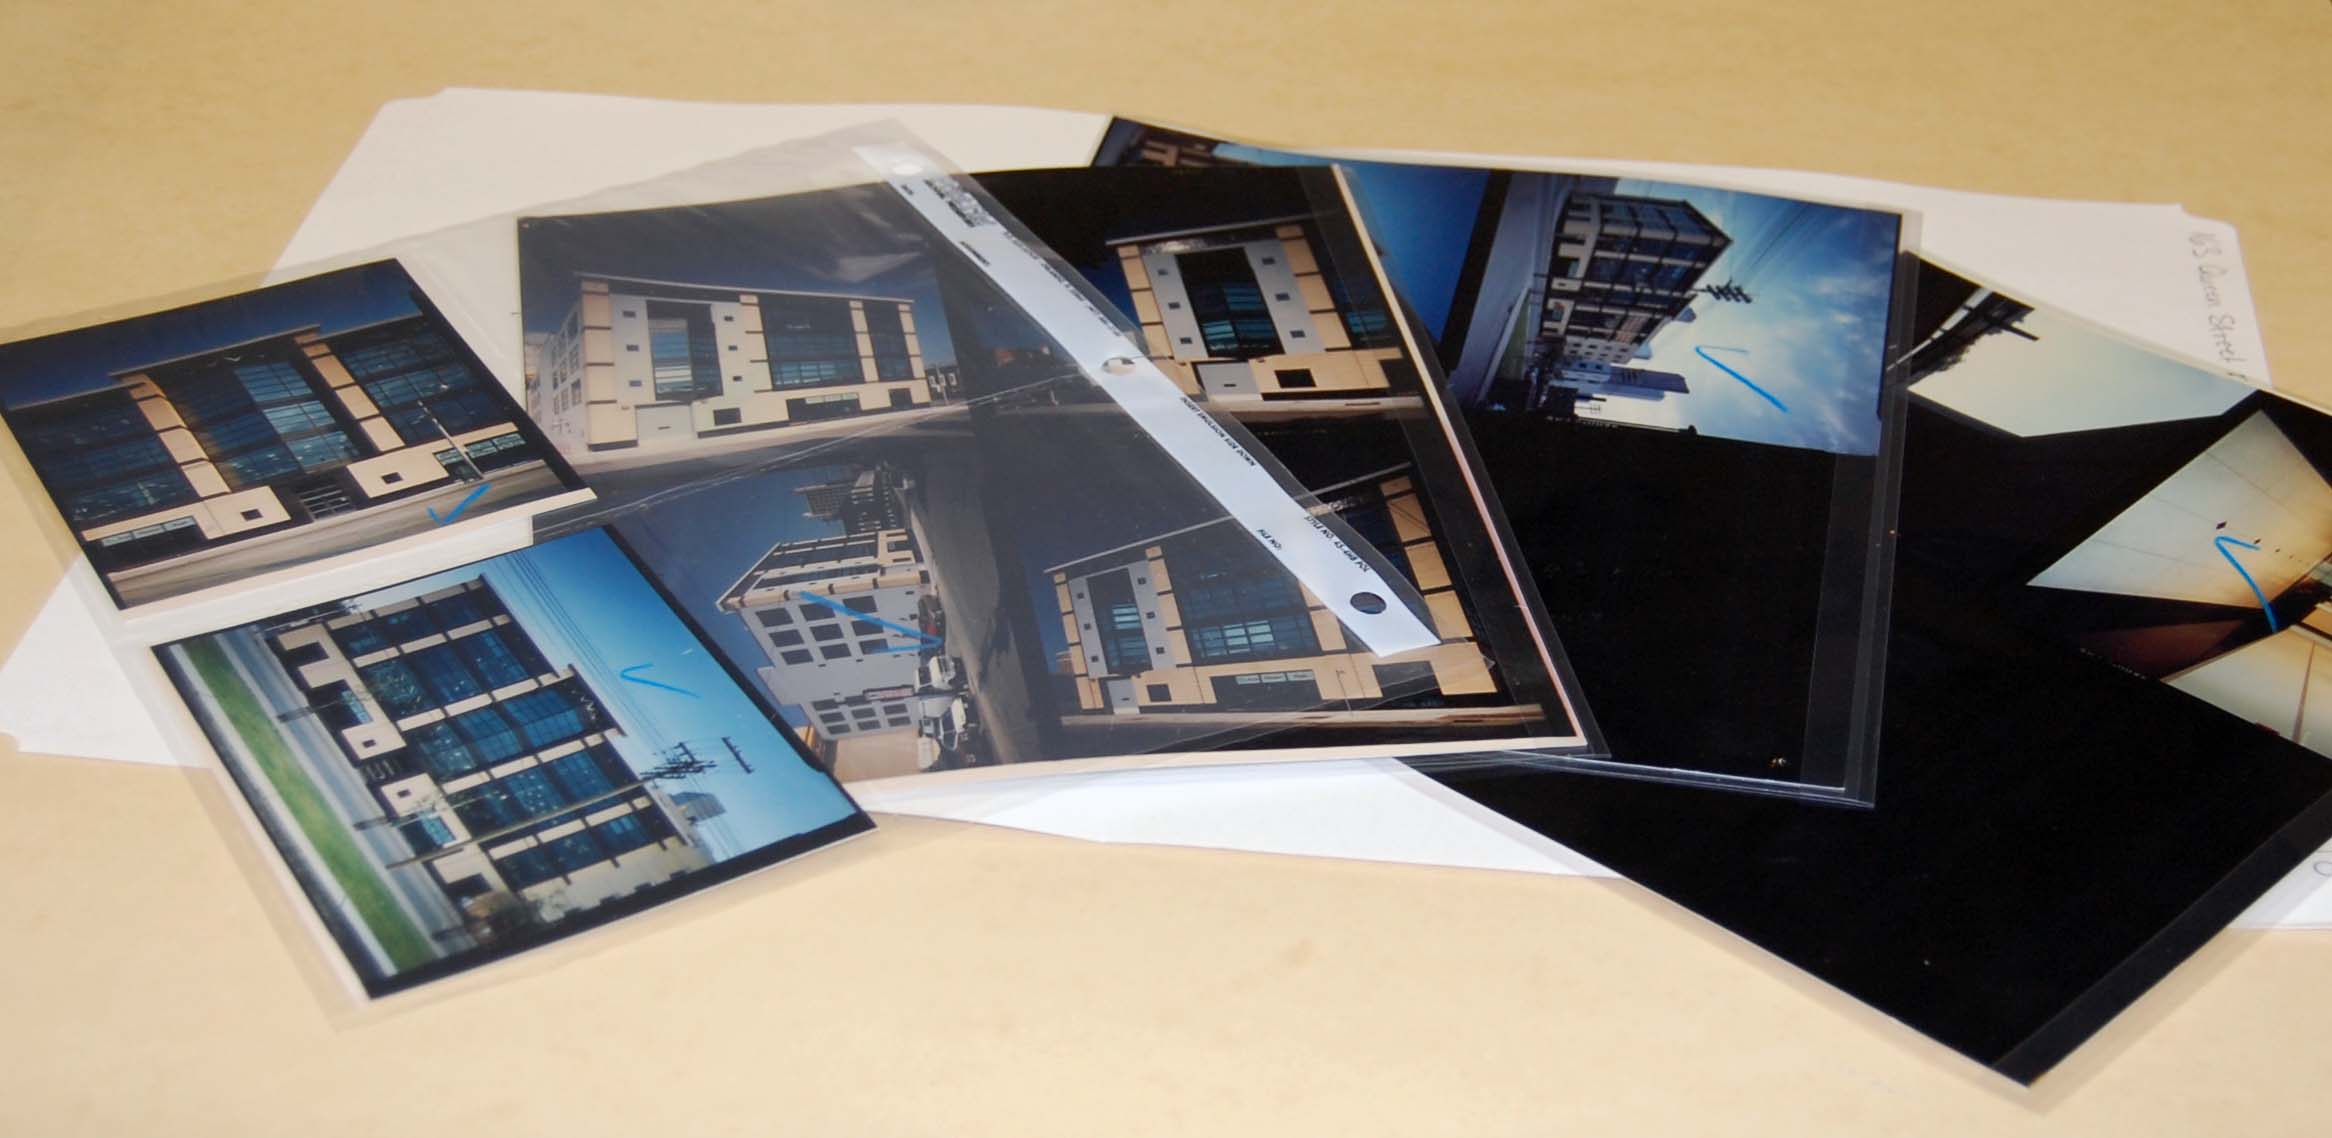
Diagram depicting the set-up for digitizing a photographic print using a digital camera.
Storage
Digital storage
Preserving your family photograph collection doesn’t end with digitization. To ensure that your memories don’t get lost in a sea of desktop files or become an obsolete file format, you will need to maintain and follow a system. Organization is key in the prolonged care of both physical and digital photography collections.
An effective and easy way to start thinking about how to organize your digital images is to picture their file structure like a hierarchical tree:
Example of a tree-style arrangement for digital photograph storage. If you are an avid photographer, you may choose to add another level, such as “2011 artistic” and “2011 events.”
Choose file names that will make your images easy to search so that they won’t be hard to find when you need them, and save in formats that you know you will be able to access in five years (e.g. JPEG, TIFF). Keep a backup (or two!) on a cloud or an external hard drive, so that if something should happen to your computer and your files are destroyed, you will always have another copy. Set a reminder to update your backup weekly, monthly, or yearly depending on how many pictures you’re taking and if possible, store the backup at a different location.
Physical storage
A rule of thumb is that generally photographs like to be stored in the same environment that people like to be in. A cool, dark place with about 40% relative humidity is ideal, so it is best to avoid storing your prints in a damp basement or humid attic. Also remove any potentially harmful storage materials, such as glassine, which has been a popular material for photo sleeves.
Acid-free paper sleeves are a good option for storing photographs you don’t intend to handle often.
If your prints are in a shoebox you’re on the right track, but ideally it is best to store them in a material less acidic than cardboard to ensure they will not be subject to the harmful results of off-gassing. To prevent any warping it is best to lay them flat, and in case there is any adhesive, try to separate each print with Mylar, acid-free paper, or acid-free tissue. House them in individual sleeves, envelopes or enclosures to protect them from handling and changes in the environment.
Polyester sleeves will protect your prints while also allowing you to look at them.
If you want to store your prints upright, make sure they are kept flat by including a spacer to prevent warping.
Albums can also be a great place to store photographic prints, but you need to be careful that you are using a photo-friendly style of album. Avoid self-adhesive albums! These albums can destroy the image of your photograph and speed up deterioration. If you have some of these already in your collection, you may no longer be able to remove your prints without causing them serious damage, in which case digitization is your best bet for image preservation. If you are creating a new album here are some best practices to follow:
Use photo-corners to attach prints to the pages. This way, only the corners will touch adhesive, and not your prints. Should someone want to remove the print from the album they will be able to do so with little to no damage to the object.
Use acid free paper. This will delay deterioration such as silver mirroring and fading.
Separate the prints so they are not stored facing each other. Some albums are sold with acid free tissue in between the pages that will do this for you. If you are using a binder, you can also do this by inserting each page into a Mylar (Polyester) sleeve.
Avoid writing directly onto your prints. If you have information to include about the subject of an image, inscribe this on the space surrounding your print. Inks can bleed or gradually discolour your images.
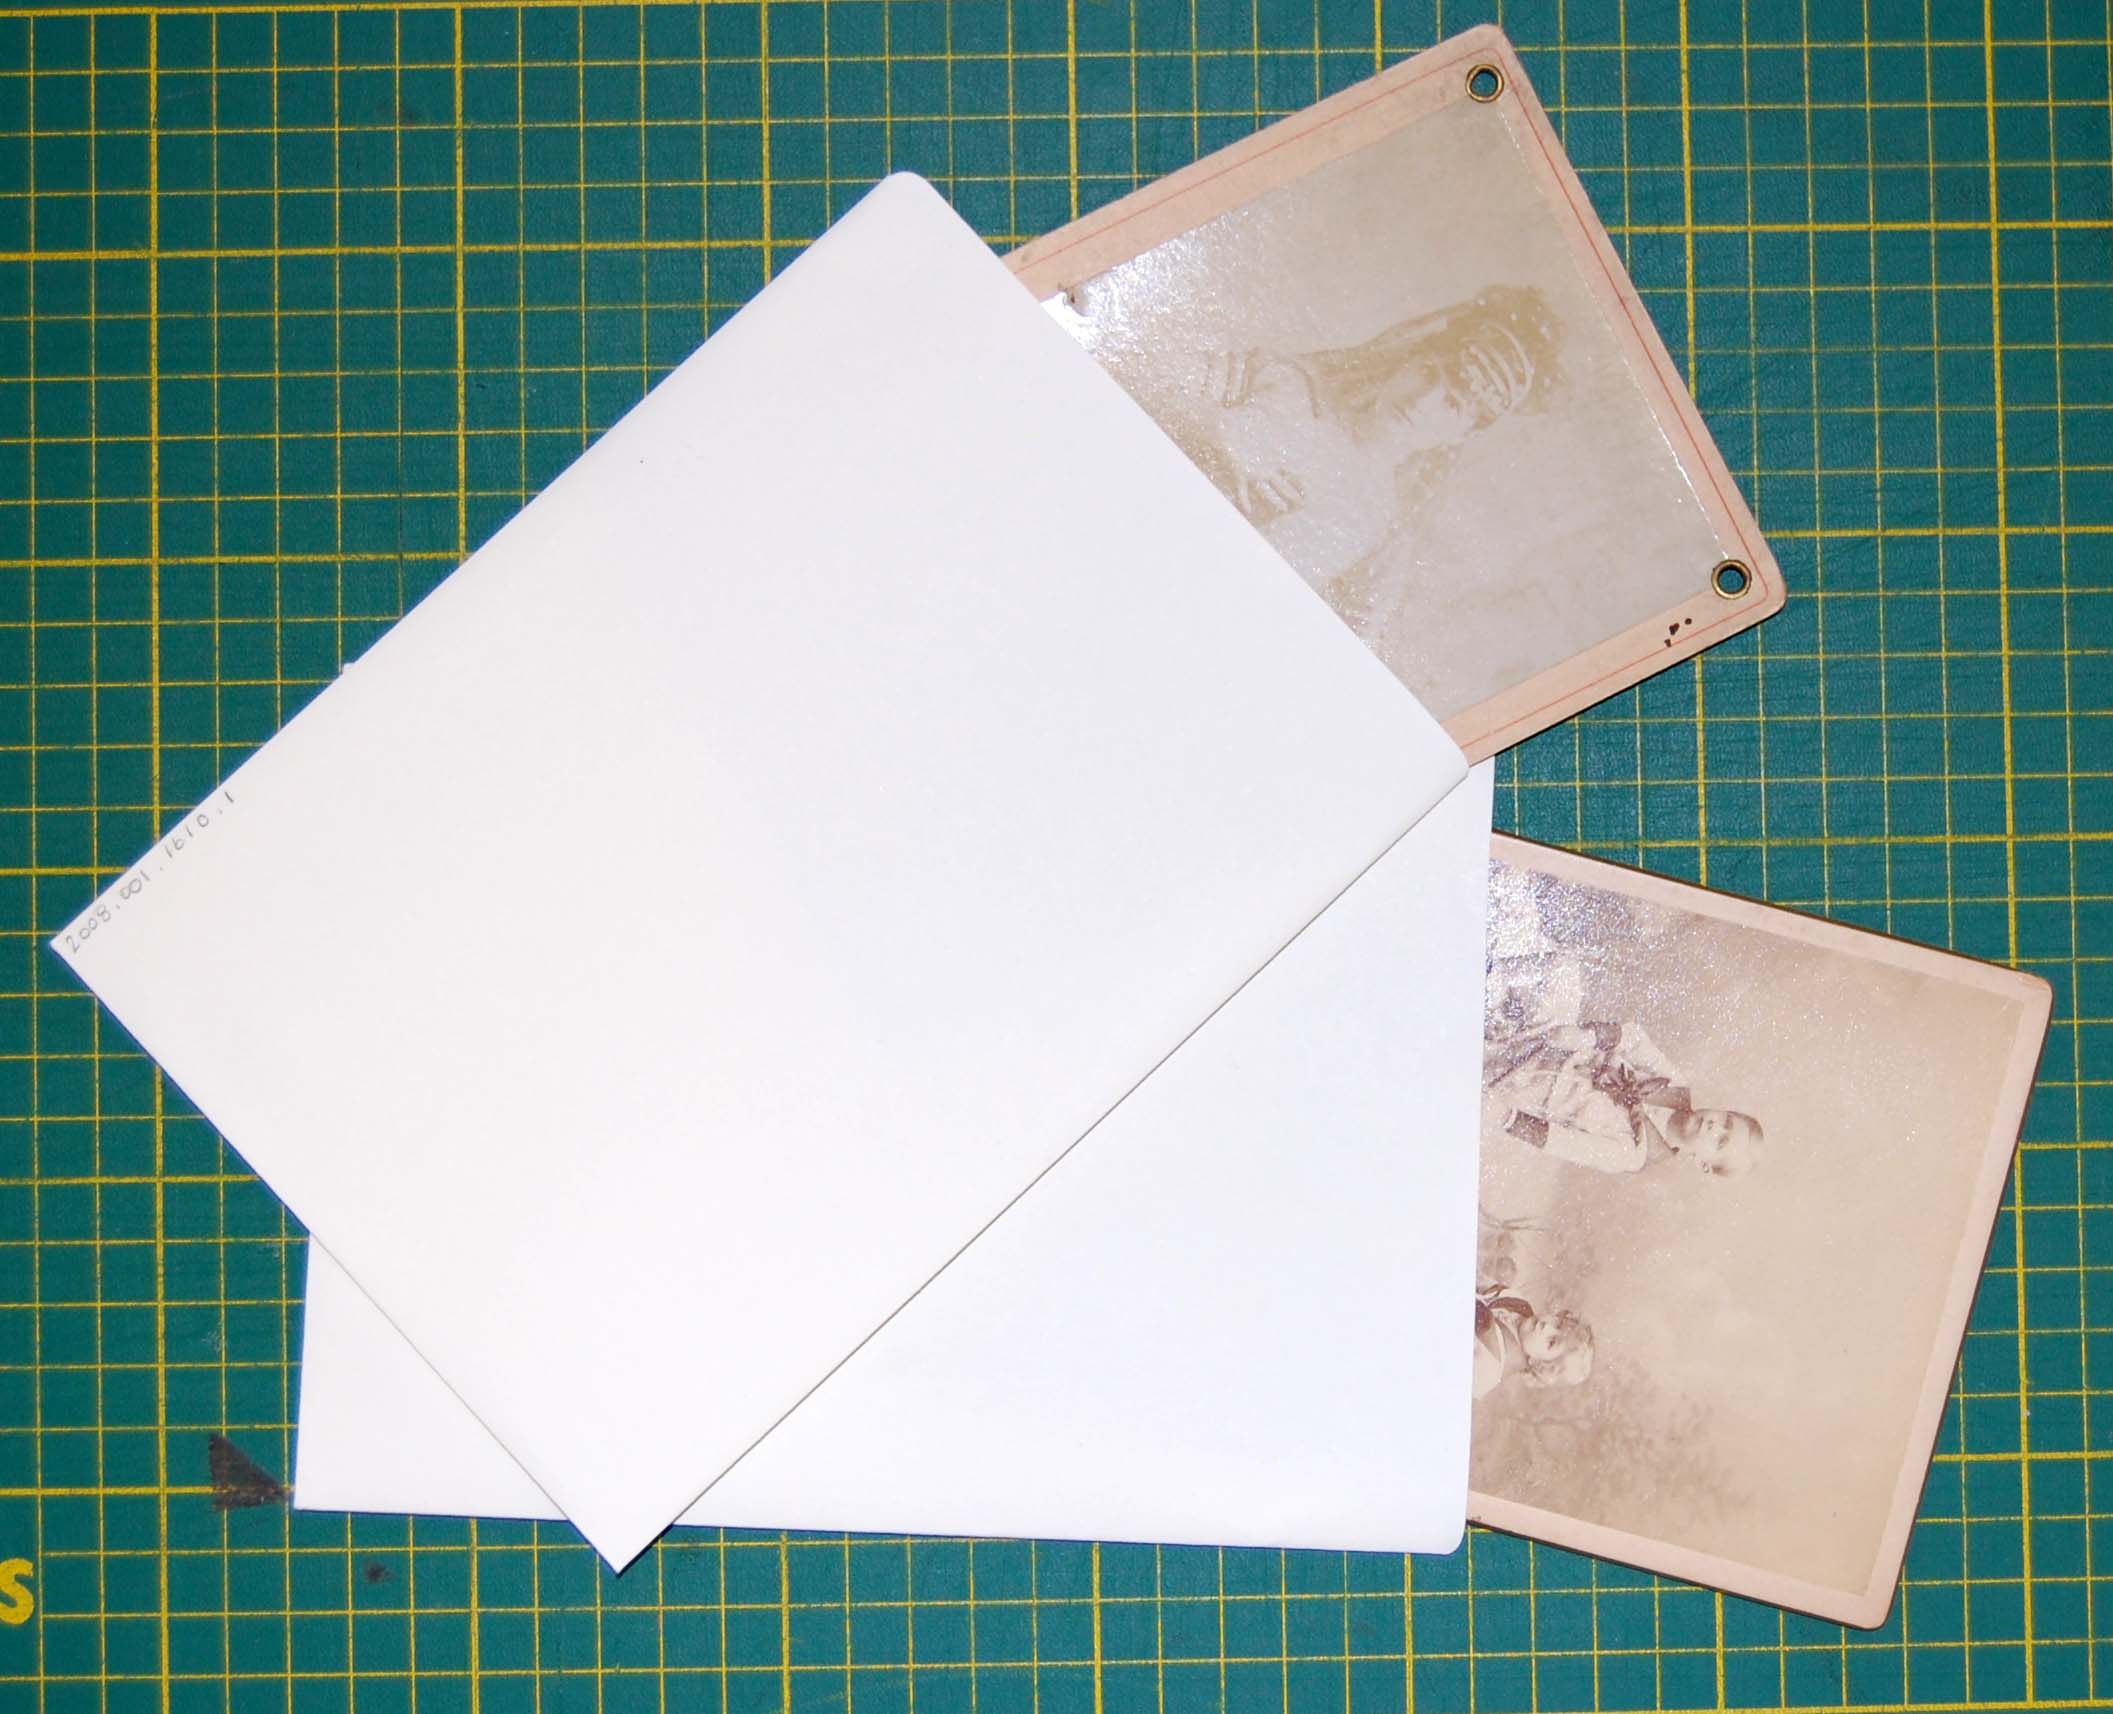
Don’t use self-adhesive albums! Reference number: 2005.001.06.01.008.2.
Do use photo corners, archival sleeves and tissue to protect your prints. Write descriptions on the area around the photograph, and not on the photo itself. Reference number: 2008.001.2.010.
Other notes on preserving your family photographs
Negatives and transparencies
If you have negatives interfiled with your prints they can also benefit from re-housing and separate enclosures. Acetate negatives in particular might be something you choose to digitize, as they are prone to vinegar syndrome, a form of deterioration that can only be delayed by freezer storage.
Undeveloped rolls of film
If you have undeveloped rolls of film that you’ve been meaning to process, but haven’t got around to, sooner is better than later. Just like your prints, film is subject to natural deterioration that may have already distorted your undeveloped images. Also, your opportunity to have someone else print them is quickly diminishing as the onset of digital takes its toll on commercial printing businesses.
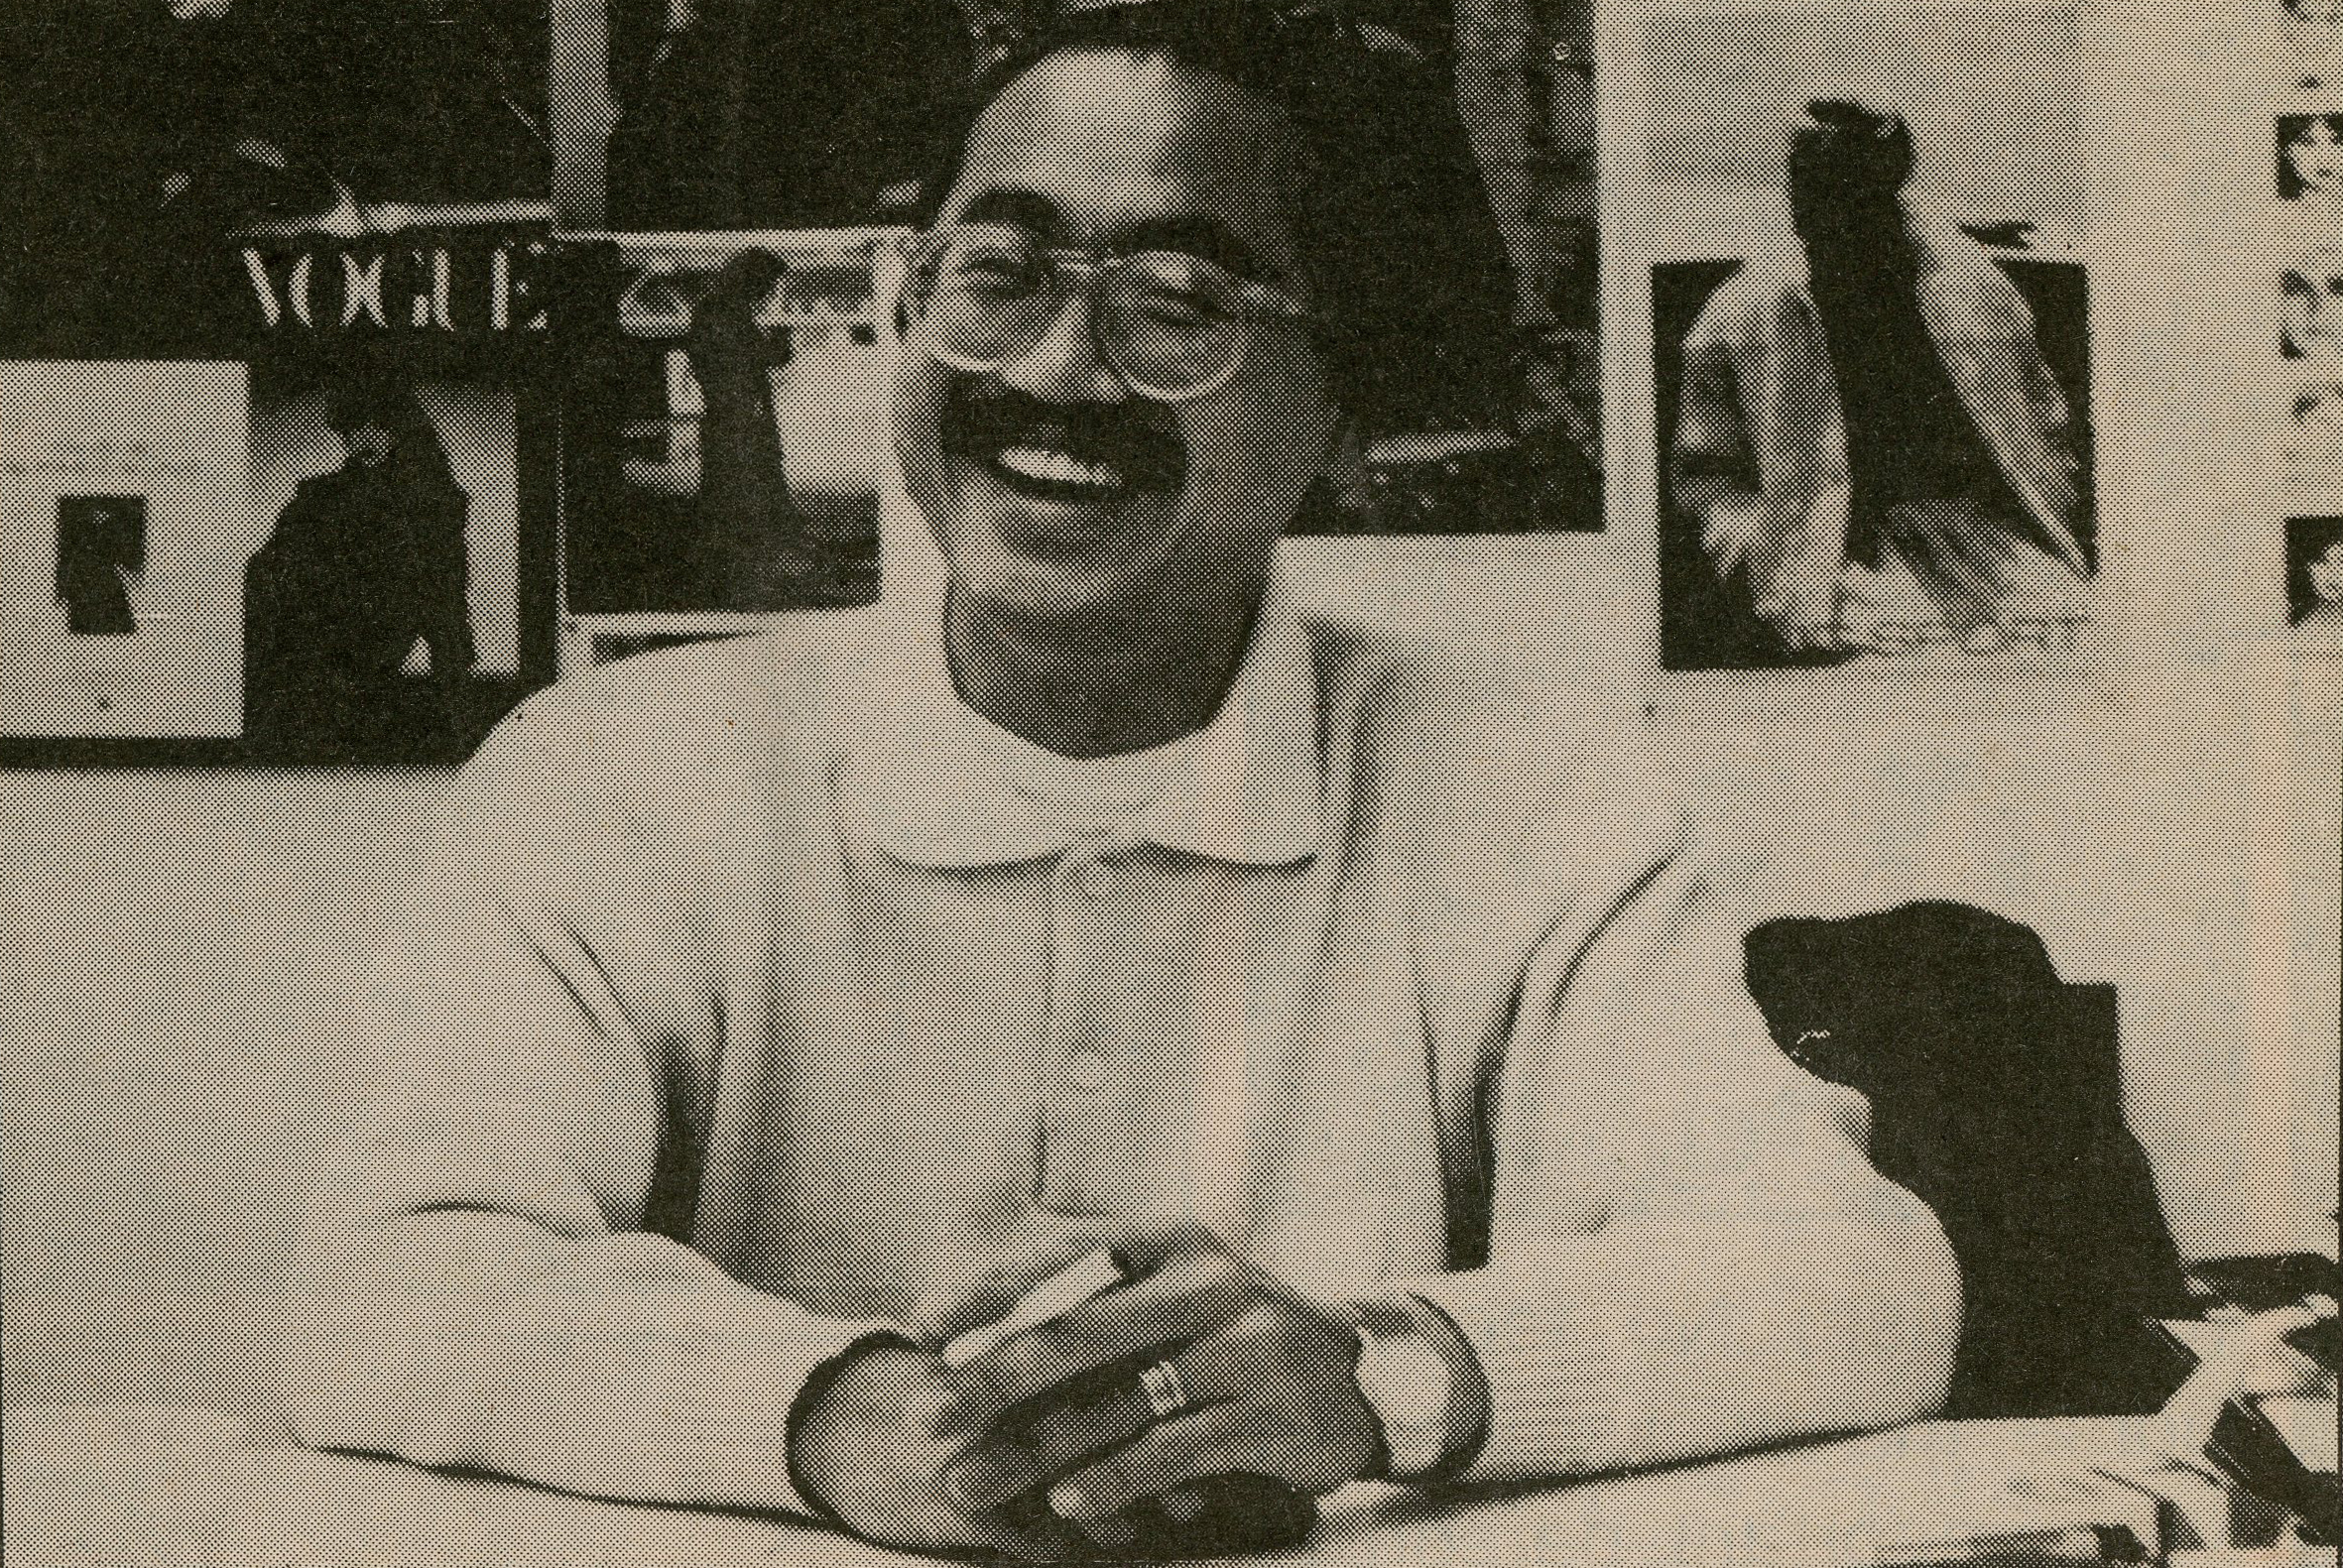
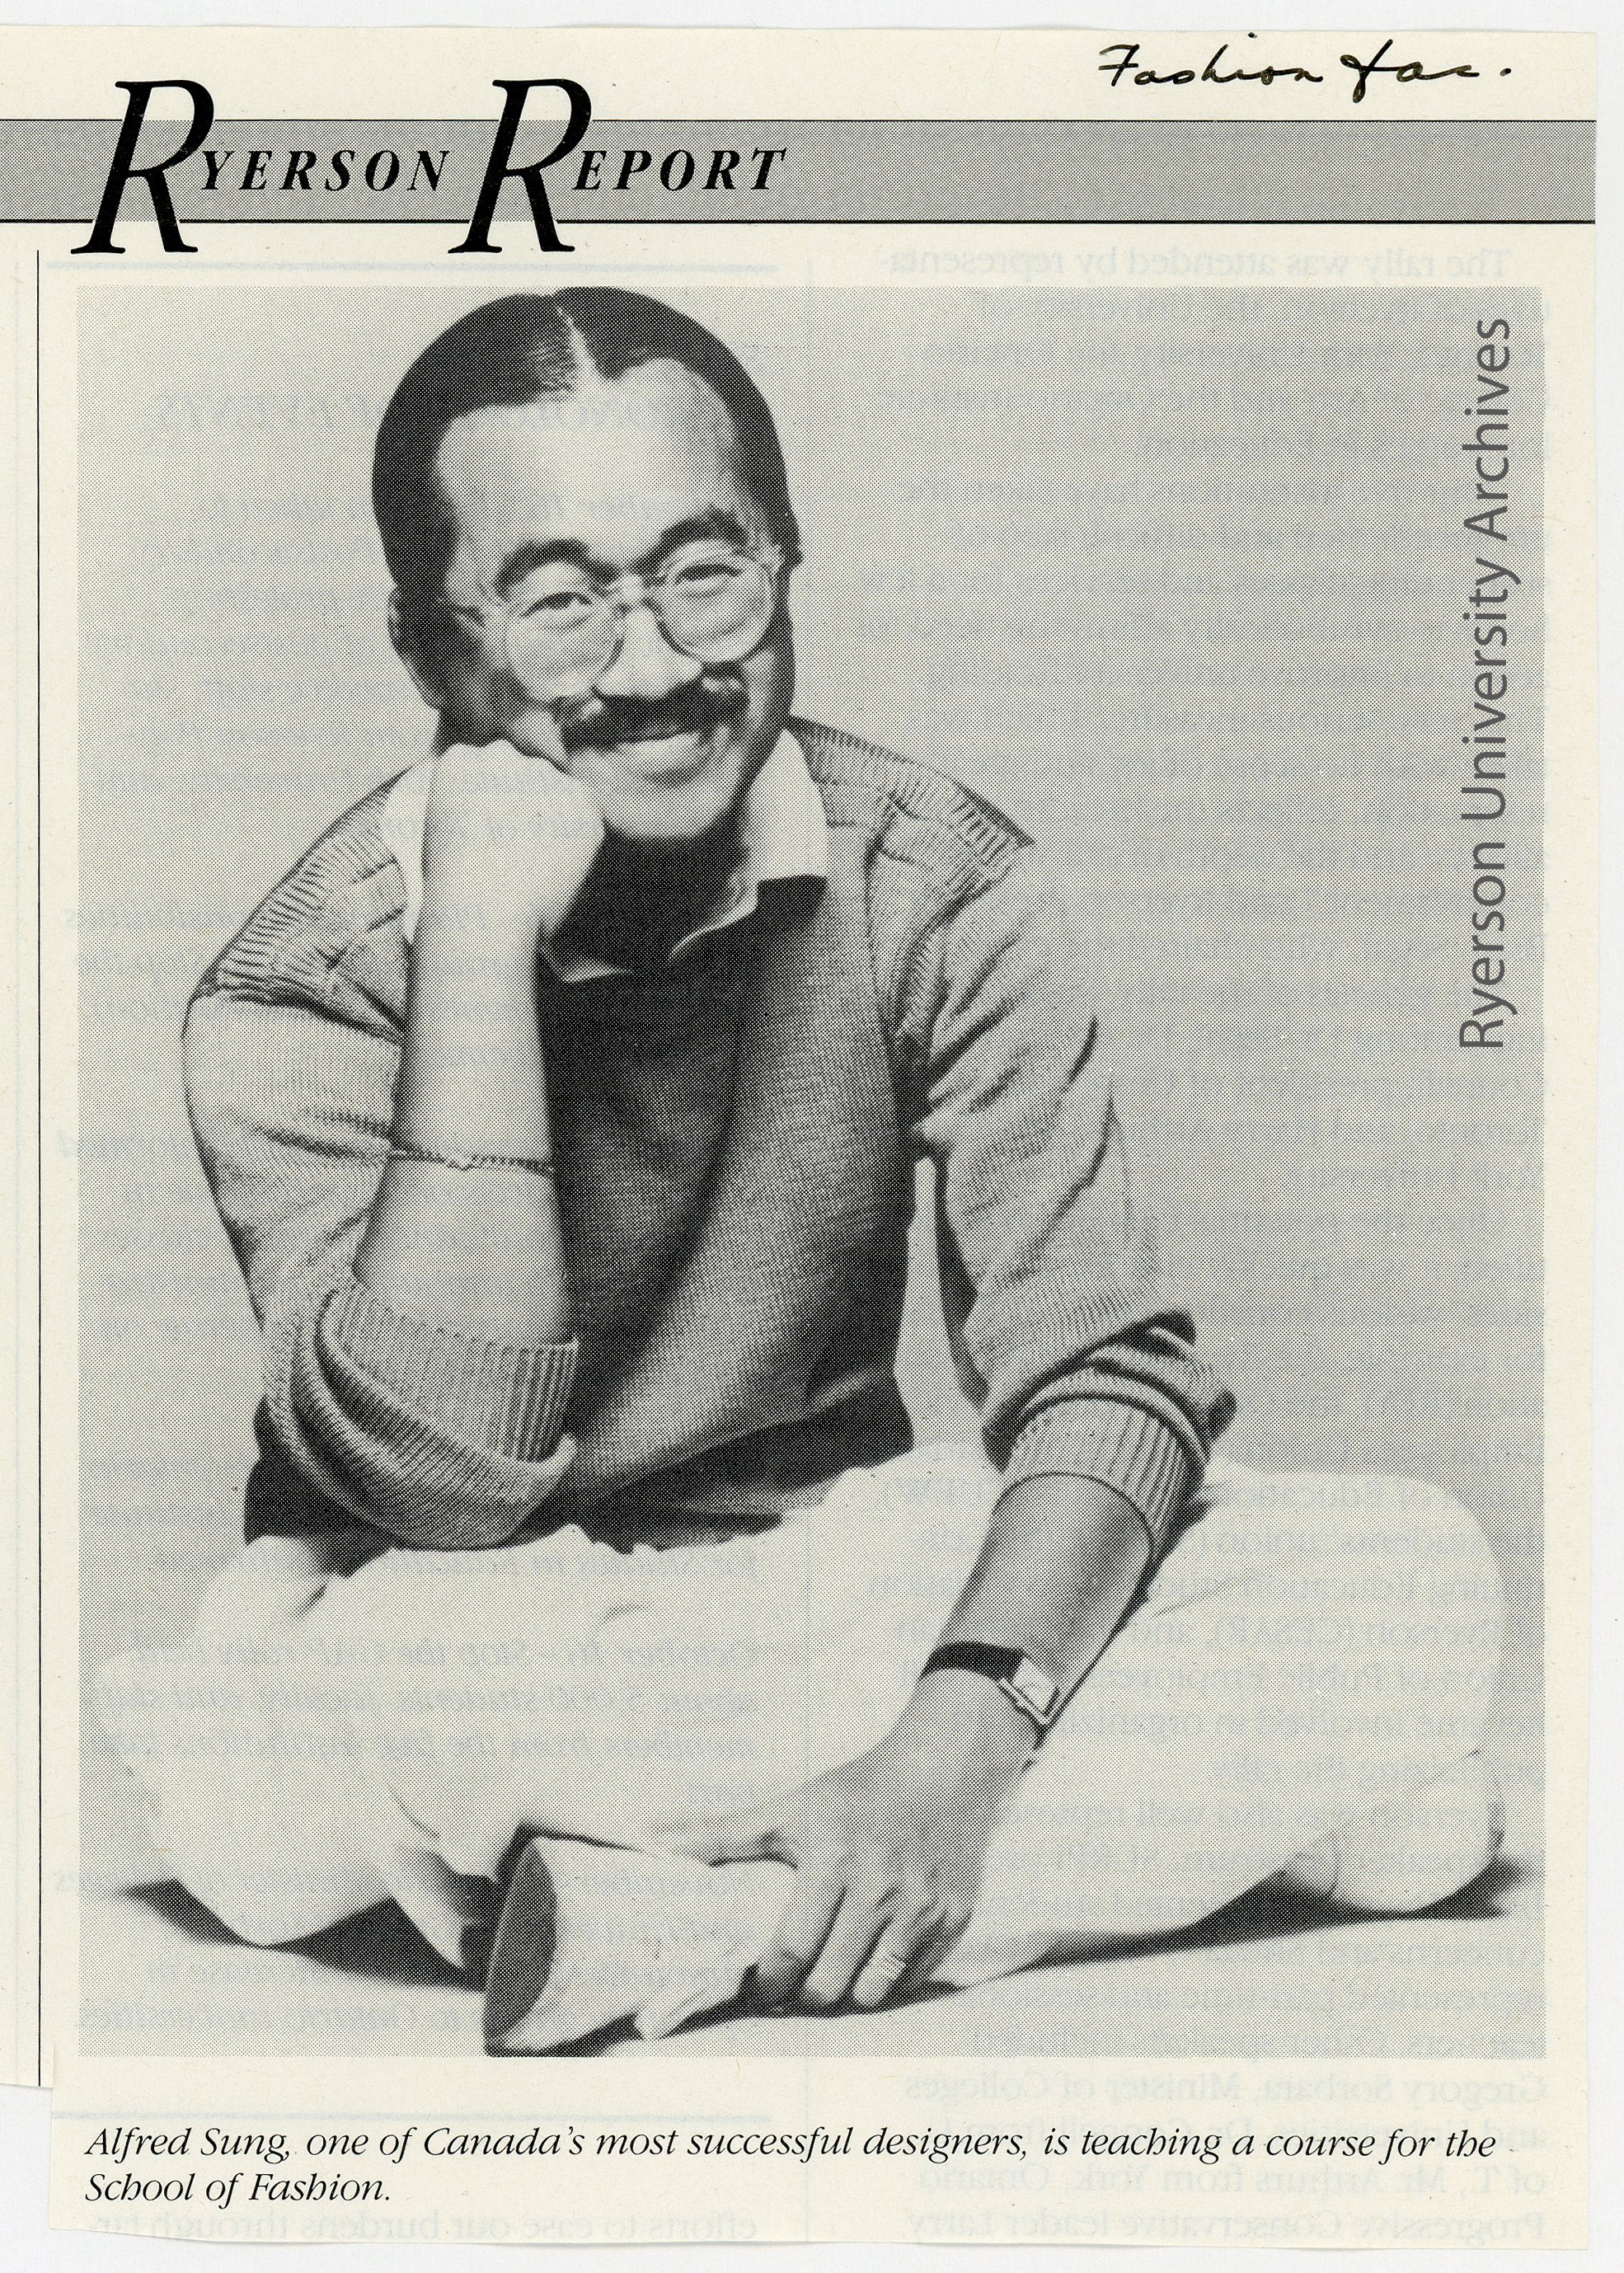
Now one of the most established Canadian fashion designers on the international scene, Sung began his career as a fashion entrepreneur in the 1970s when he opened retail clothing store, Moon, in Toronto’s Yorkville neighbourhood. In 1979, he and fellow fashion entrepreneurs, Joseph and Saul Mimran, established the Monaco Group Inc. and began designing and distributing ready-to-wear clothing to fashion retailers throughout North America under the Alfred Sung label. Five years later, the group opened a series of free-standing retail stores under the now-well-known name Club Monaco.[1]
In 1986, Sung signed on with Ryerson for a one-year term to teach Apparel IV, a fourth-year course in tailoring and sportswear design. The course was meant to give students practical experience creating a comprehensive collection[2] and to teach burgeoning designers the business side of the industry[3]. Sung knew this side all too well: the year he joined Ryerson, his company had just branched out into sportswear with Sung Sport, was launching its first perfume line, and was the first Canadian designer brand to be traded on the Toronto Stock Exchange.[4]
As described in The Ryersonian, Sung agreed to take on the teaching post because he wanted to give back to an industry that had been so kind to him. He even donated his salary to the School, creating two scholarships in Apparel Management and Design, each equal to a year’s tuition [5]. His hiring kicked off the School of Fashion’s practice of recruiting leading contemporary fashion designers to teach Ryerson students. This hiring trend, not yet common in Canadian fashion programs at the time Sung signed on, continues to benefit students in the School today.
To learn more about the history of Ryerson’s School of Fashion and about other notable Ryersonians past and present, or simply to peruse back issues of The Ryersonian, The Ryerson Rambler, and The Eyeopener, visit Ryerson Archives & Special Collections on the 4rd floor of the library.
References
1. “Alfred Sung: Biography.” Alfred Sung. Accessed March 31, 2015. www.alfredsung.com
2. McDowell, Carol. “Sung has designs on teaching.” The Eyeopener, November 13, 1986.
3. “Ryerson Report: Sung teaches course for School of Fashion.” The Ryerson Rambler, Winter 1986.
In the age of social media there are many ways for news to be communicated. Faculty, staff, students, alumni, and the general public can find out what is going on around campus through Twitter, Facebook, YouTube and many other sources. How did Ryerson get the word out there before the internet and smart phones – let’s take a look.
University Media
Ryerson has had various departments and offices responsible for getting the official news out to the community and the public. The Office of Information Services, the Department of Community Relations, the Office of University Advancement, and now University Relations were/are responsible to spreading the official word of Ryerson.
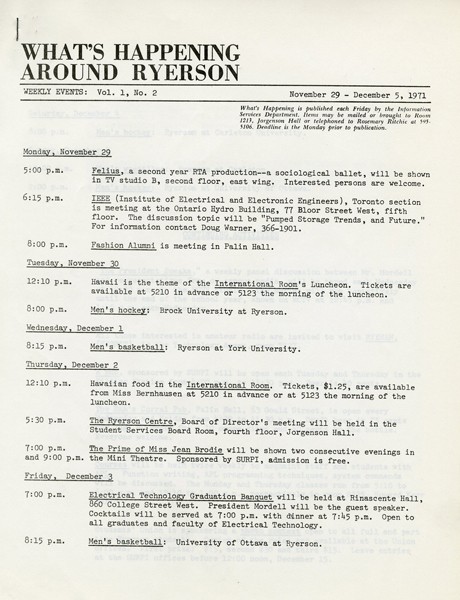
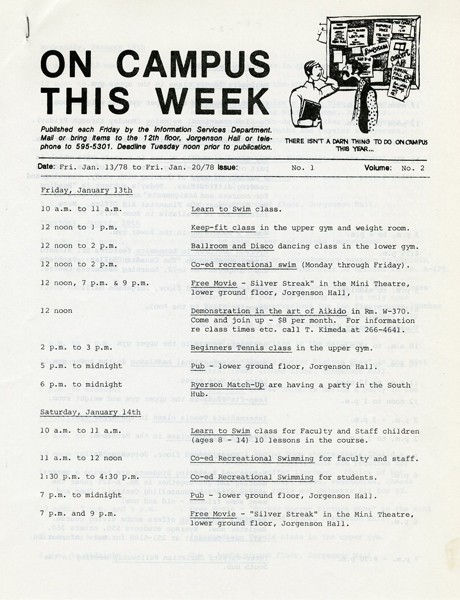
What’s Happening around Ryerson
What’s Happening around Ryerson (1971-1977) was published once a week as an events calendar by the Department of Information Services. It was replaced by On Campus this Week (1977-1986). The Office of University Advancement published Campus News (2004-2009) which was emailed out to the Ryerson Community announcing individual events, campus notes, and other related information. This was discontinued in 2009 with the creation of Ryerson Today. The Office of University Advancement, and now the Department of Communications, Government, and Community Engagement periodically send out news releases about significant Ryerson occurrences and events.
What’s Happening around Ryerson/On Campus this Week (RG 4.01)
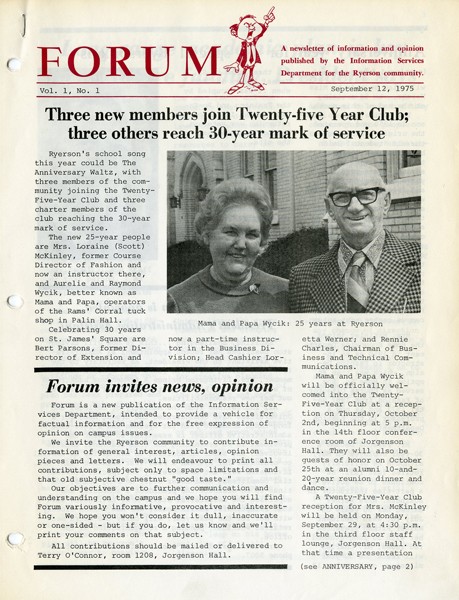
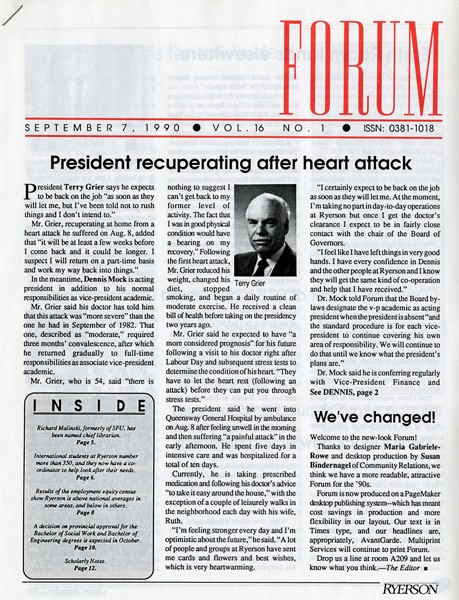
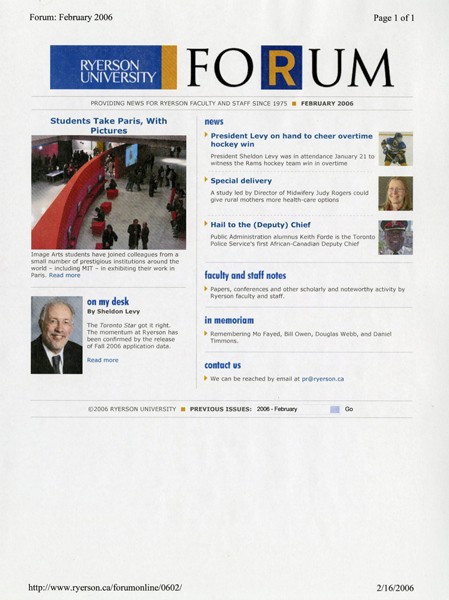
The FORUM newsletter
The FORUM was a newsletter of information and opinion first published by the Department of Information Services September 12, 1977. The FORUM continued to be published by the Department of Community Relations, and the Office of University Advancement changing styles and formats. It went to a digital only format in 2006 and continued on until 2009 when it too was replaced by Ryerson Today.
FORUM Newsletter (RG 4.10)
FORUM Newsletter (RG 122.04)
FORUM Newsletter (RG 122.04)
FORUM Newsletter (RG 122.04)
FORUM Newsletter (RG 395.06)
FORUM Newsletter (RG 395.06)
FORUM Newsletter (RG 395.06)
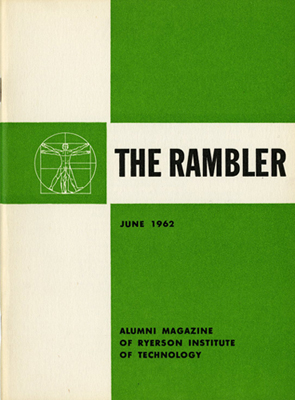
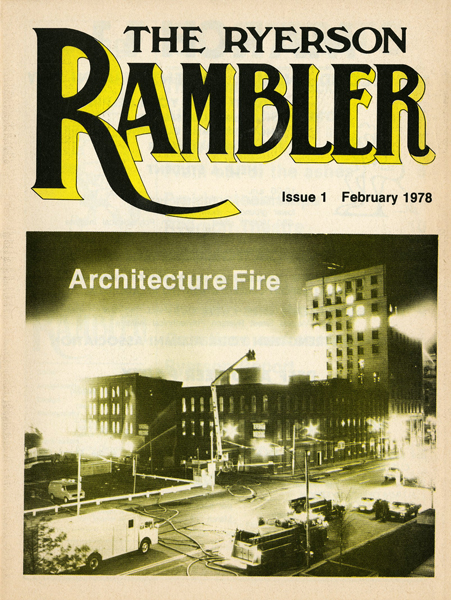
The Ryerson Rambler
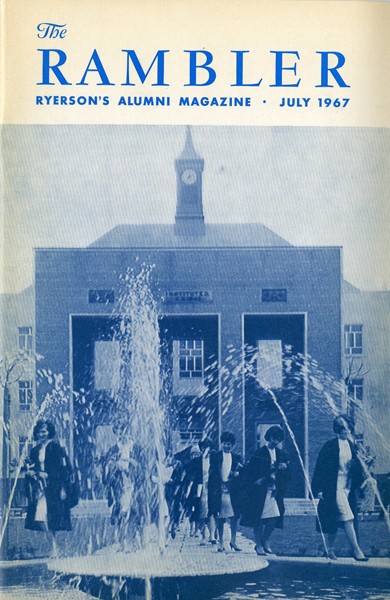
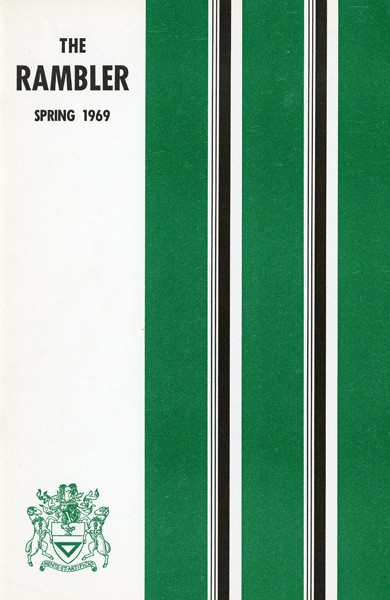
The Ryerson Rambler (RG 151.01) was first published in June of 1962, was Ryerson’s alumni magazine. It was published initially by the Students’ Union. According to then Ryerson Principal Howard Kerr, “It is hoped in time that the Ryerson Alumni Association will be sufficiently strong to assume the responsibility involved in the financing of this project…”. It would appear that the Alumni Association took over publication in 1967. The Rambler continued publication until 1972, when it was replaced by Technikos as a source of information for Ryerson Alumni.
Technikos and Ryerson Review
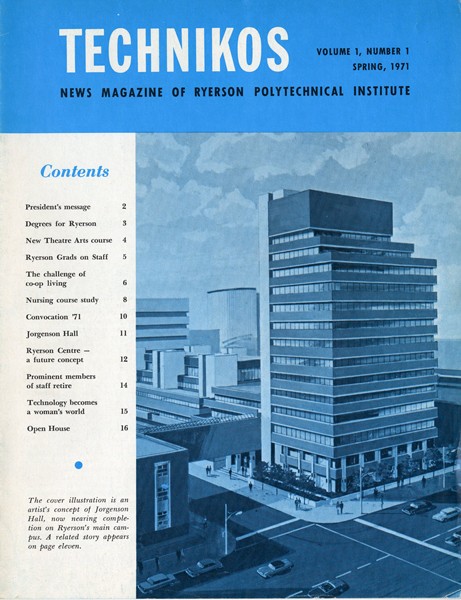
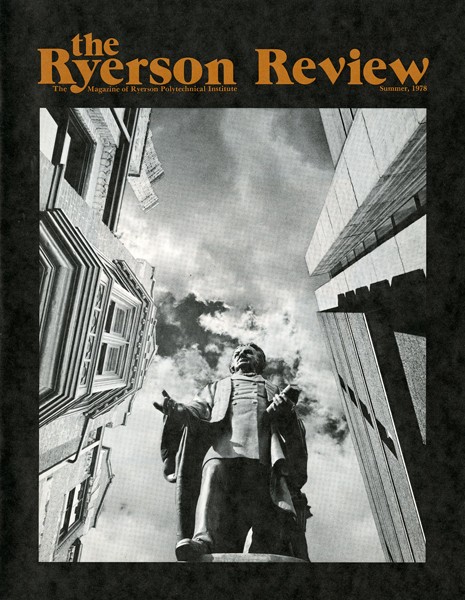
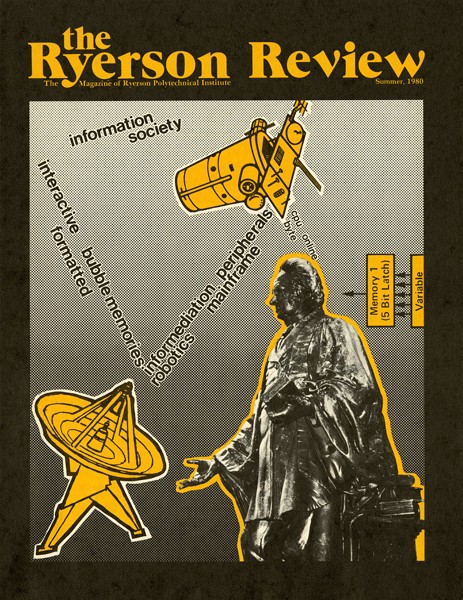
Technikos the news magazine for Ryerson Polytechnical Institute was first published in the Spring of 1971 by the Department of Information Services and according to then Ryerson President “it would be mailed to the home address of each undergraduate…Copies will also be sent to potential employers…high schools, colleges, universities, and Ryerson alumni…”. It was published twice yearly until Summer 1977 when, according to the Ryerson Rambler, “…the costs have caught up with us and a quality magazine like Technikos cannot be produced economically enough to enable us to send it to you regularly…” so publication was cut down to one magazine per year sent out during the summer months. In 1978 the name was changed to The Ryerson Review. Its last publication was Summer 1980.
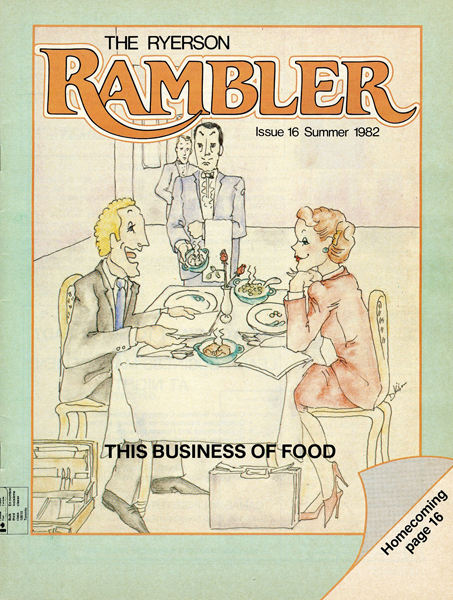
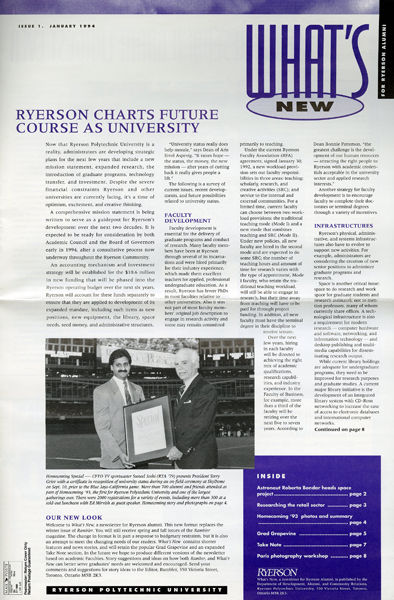
The Rambler returned in February of 1978 when the cost of producing Technikos became economically unfeasible. It was published 3 times per year. In 1994, the winter issue of the magazine was discontinued – replaced by What’s On, a newspaper-style newsletter.In 1997 they discontinued What’s On and started publishing the winter edition of the magazine again.
Ryerson Rambler (RG 151.01)
Ryerson Rambler (RG 151.01)
What’s New (RG 151.04)
Ryerson Rambler (RG 151.01)
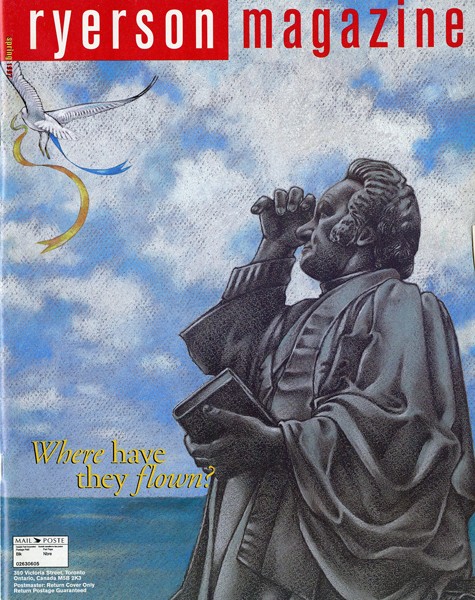
Ryerson Magazine
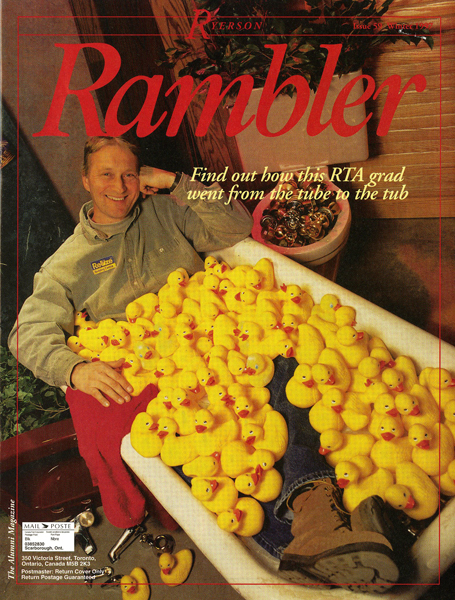
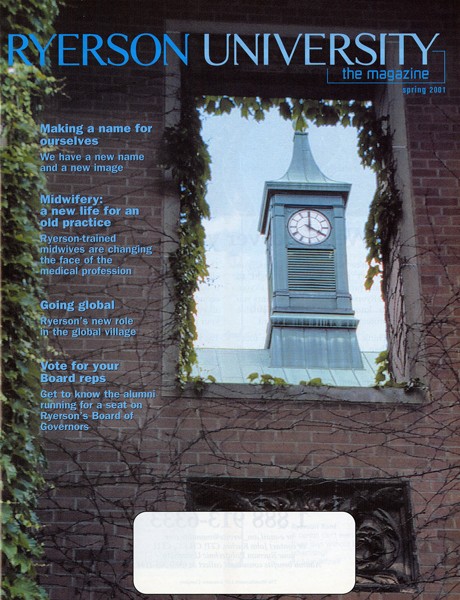
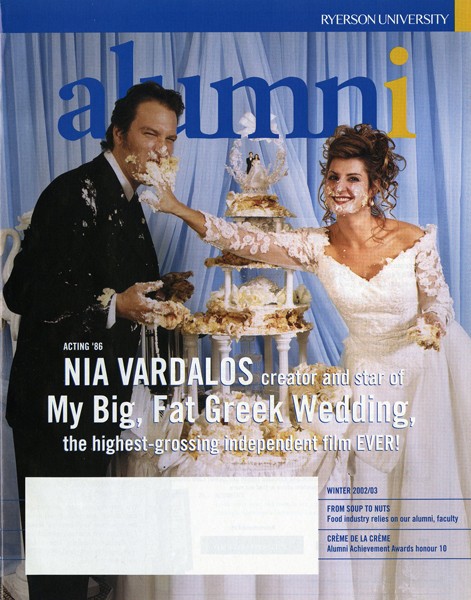
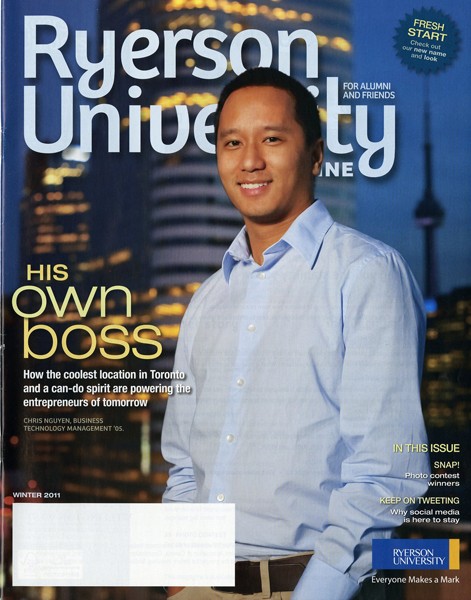
With the spring 1997 edition the name changed to RyersonMagazine (RG 395.07.02)and began publishing only twice a year. In 2001, it changed its name to Toronto Metropolitan University, the magazine – reflecting the name change of the University from Ryerson Polytechnic University to Toronto Metropolitan University. It changed its name again in 2002 to Alumni Magazine, with a final name change in 2011 to Toronto Metropolitan University Magazine.
Student Media
On the student side of the School, Ryerson has had student created publications since its inception in 1948.
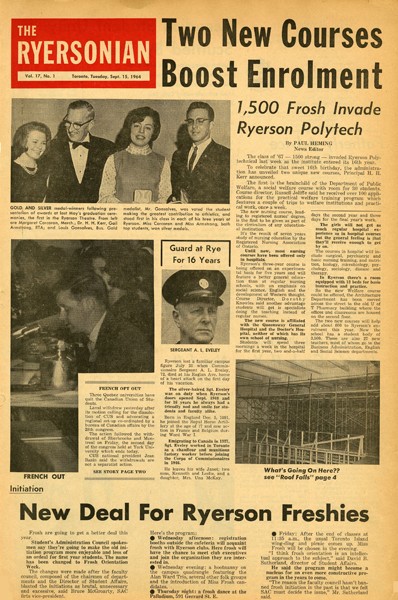
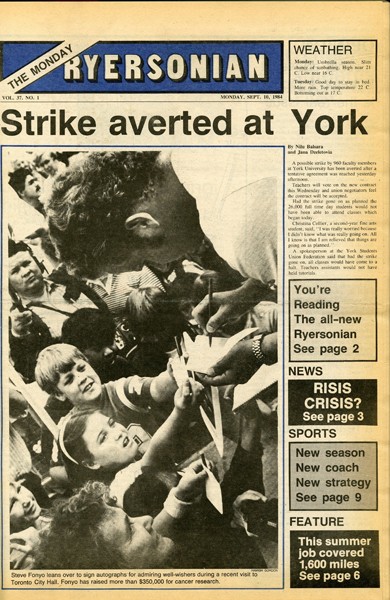
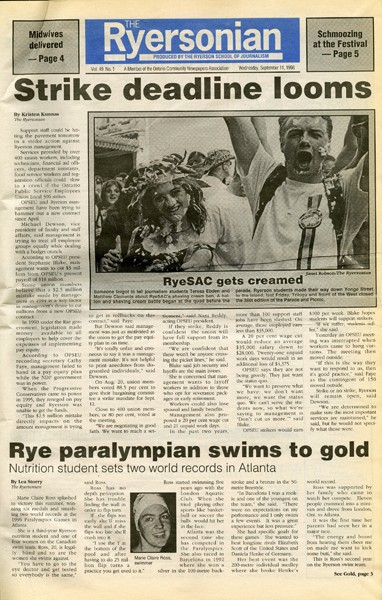
The Ryersonian
The School of Journalism began publishing a newspaper called the The Ryersonian (RG 95.05) in 1948. The first paper was published in December of that year. Starting in January of 1949 until April of 1951, the paper was published on a monthly or bi-monthly basis. In the 1951-1952 school year the paper began being published on a daily basis. It continued this way for many years, until they began publishing Tuesday – Friday, and then only on Wednesdays and Fridays. During the 1993-1994 school year it started its present schedule of weekly publication on Wednesdays. The paper is also available online at www.ryersonian.ca/.
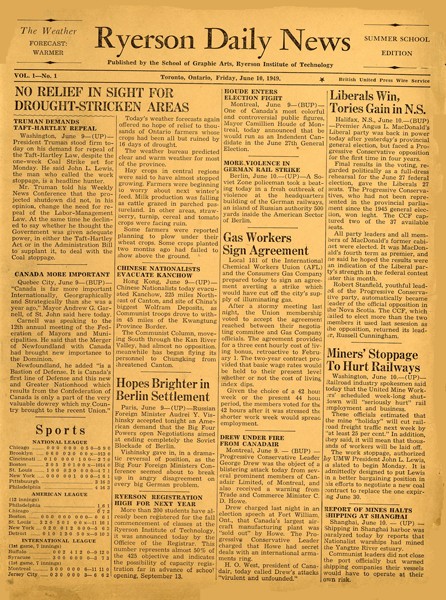
Ryerson Daily News
In June of 1949, the School of Graphic Arts, and the Journalism program started printing Ryerson Daily News. It was a one page leaflet with Canadian and International news stories.
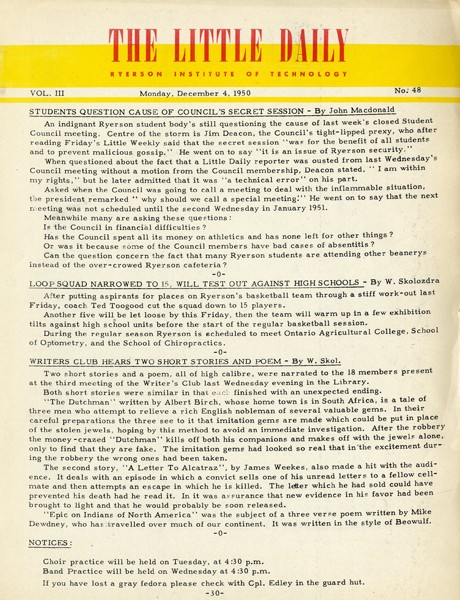
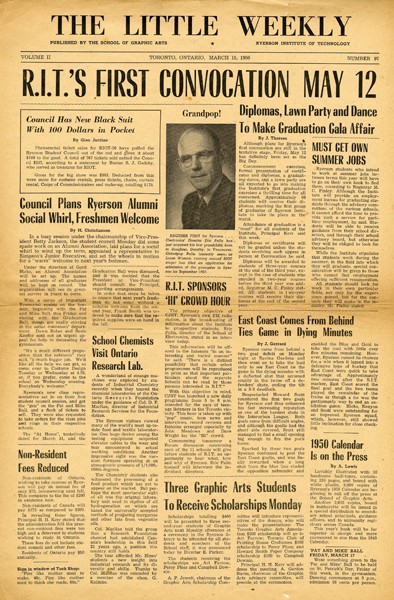
Starting in 1950 they also published the Little Weekly, a larger format newspaper style publication. Both the Daily and the Weekly ended publication in January of 1951.
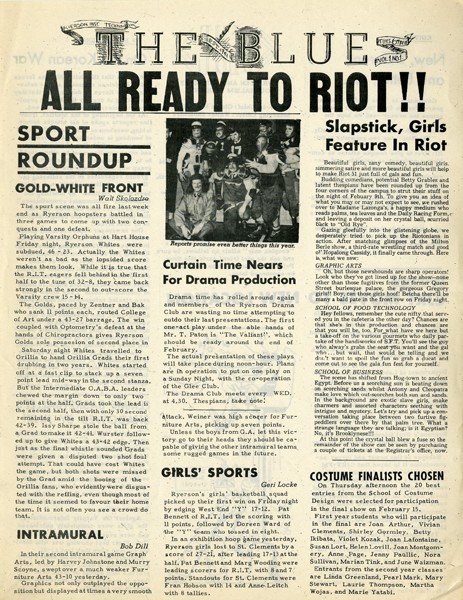
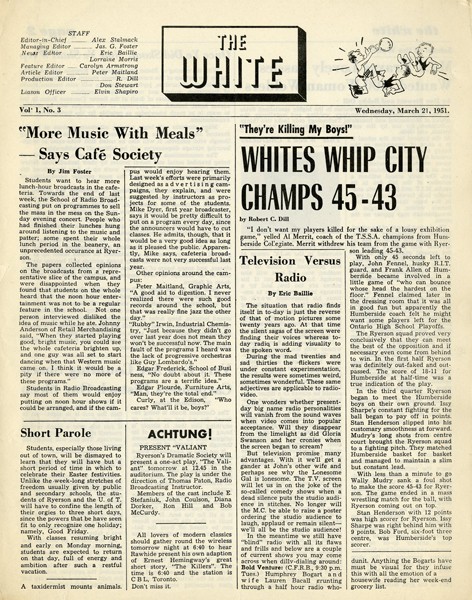
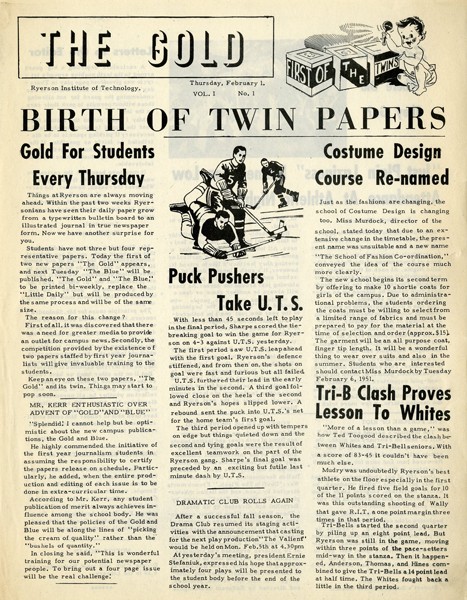
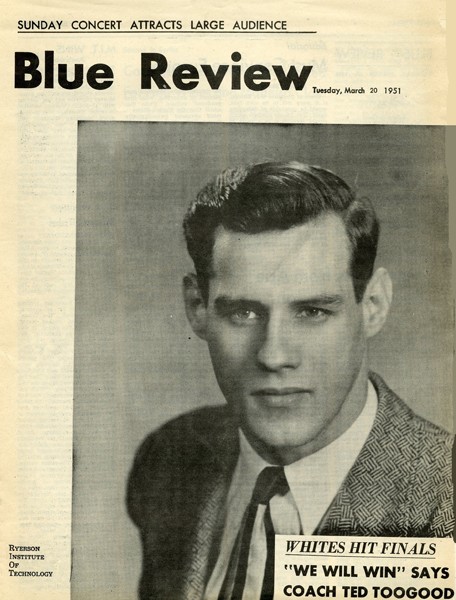
To replace The Little Weekly, Journalism students started printing three different small newspapers on three different days – The Blue (RG 95.31) on Tuesdays, The White (RG 95.28) on Wednesdays, and The Gold (RG 95.30) on Thursdays. They were produced between February and April of that year. In March and April of 1951 Journalism also printed The Blue Review (RG 95.33).
RG 95.31
RG 95.28
RG 95.30
RG 95.33
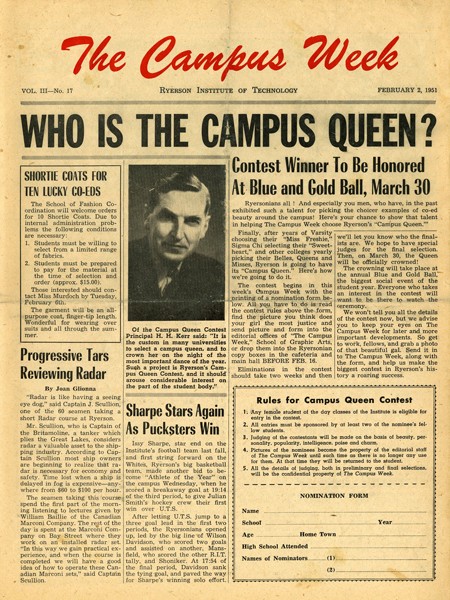
The Campus Week and TY-PI
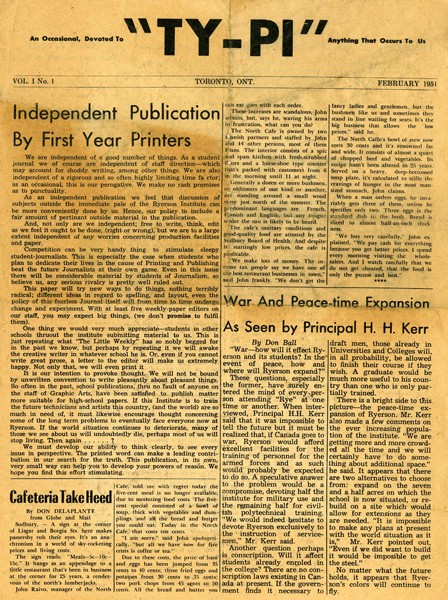
The Campus Week also was created to replace the Little Weekly. First printed February 3, 1951, it was written and edited by Journalism students and printed by the the School of Graphic Arts. It had a four page format – mirroring that of The Ryersonian. It does not appear that this continued to be published in the 1951-1952 school year. There was an independent publication created in 1951 called “TY-PI”, created by first year students in the Graphic Arts and Journalism programs.
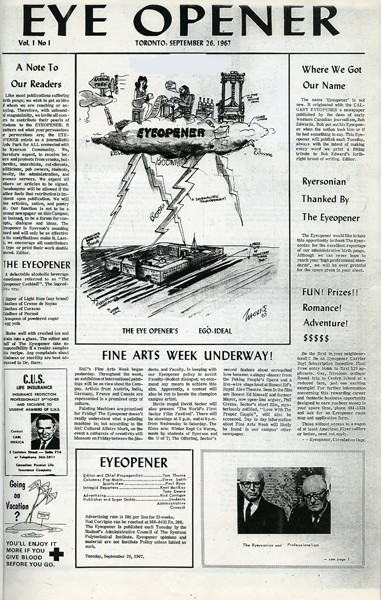
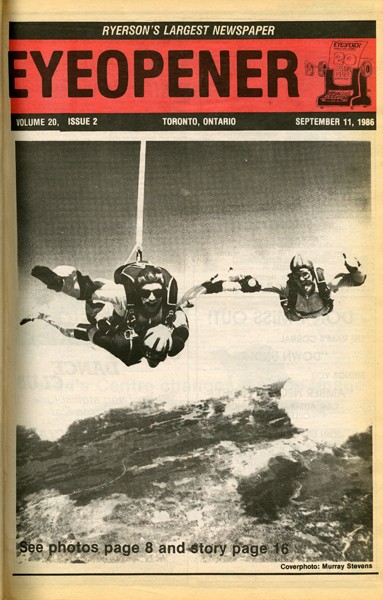
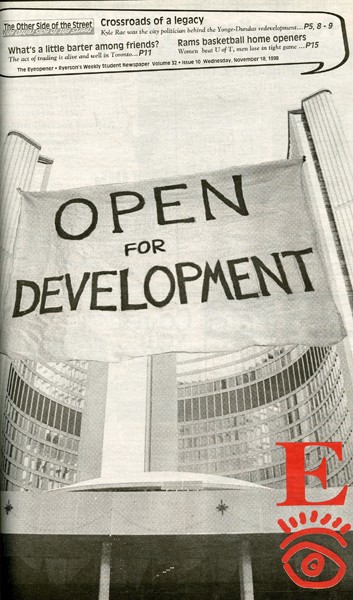
In 1967 the Eyeopener Newspaper (RG 146.1) – at first called the Eyeopener Magazine took its name from the Calgary Eye Opener, newspaper published by Bob Edwards 1902-1922. It was created because, as its first editor Tom Thorne stated, many students felt that the Ryersonian was not representative of all of Ryerson’s students. Published on Tuesdays by the Students’ Administrative Council on a weekly basis, it was a member of the Canadian University Press. During the 1968-1969 school year it began being publishing on Thursdays and starting in September 1990 it changed to its current schedule of publication on Wednesdays. The Eyeopener is available online at theeyeopener.com.
All of these publications contain valuable information about the life and times of Ryerson and its students, staff, and faculty. They have been an invaluable resource for many research projects.
They are available for viewing in Archives & Special Collections. Please call (416) 979-5000 ext. 7027 or email asc@ryerson.ca for an appointment.
Toronto Metropolitan University offers more than 100 undergraduate and graduate programs, and is home to more than 40, 000 students and 2700 staff and faculty. But how many students attended Ryerson the first year it opened? What kinds of courses were available for students to take and are any of them still offered today? Let’s take a look back at the first year of the Ryerson Institute of Technology.
1948-1949
1948 Course Calendar
When the Institute opened its doors to approximately 200 students in September of 1948, it was one of four technical institutes run by the Department of Education for the Province of Ontario. The other 3 were: The Institute of Textiles (Hamilton); The Institute of Mining (Hailebury); and The Lakehead Technical Institute (Port Arthur).
It offered 4 different options for education: technological courses; extension courses; courses supervised by Department of Education for other governmental departments; and courses for the University of Toronto.
Technological courses
There were 10 schools that first year that offered 2 year diploma and certificate courses on the level between high school and university. Admission requirements were a minimum of a grade 12 education or an equivalent standing based on age, practical experience, and educational background. Fees were a $5 registration fee, a $25 tuition, a $10 laboratory or shop fee, and a $10 Students’ council fee. For non-resident British subject students tuition was $200, and for non-resident non-British subject students tuition was $300.
The schools were:
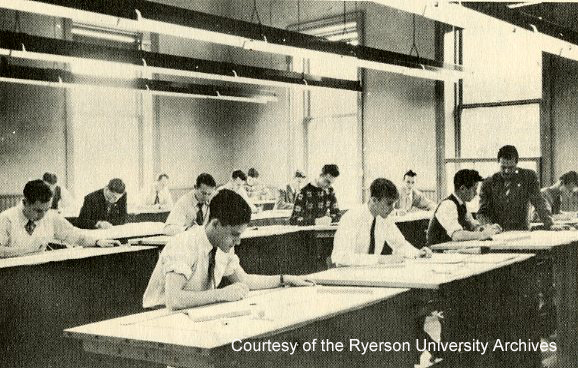
School of Architectural Draughting – architectural and structural draughting and design
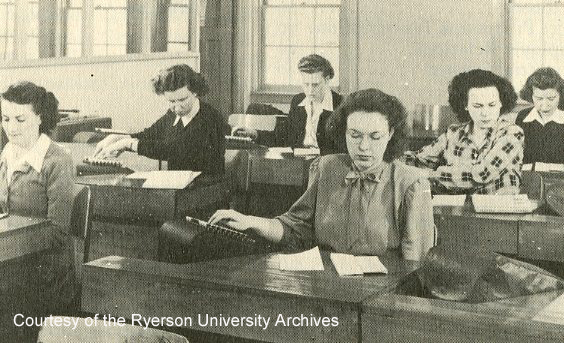
School of Business – retail merchandising and business machines
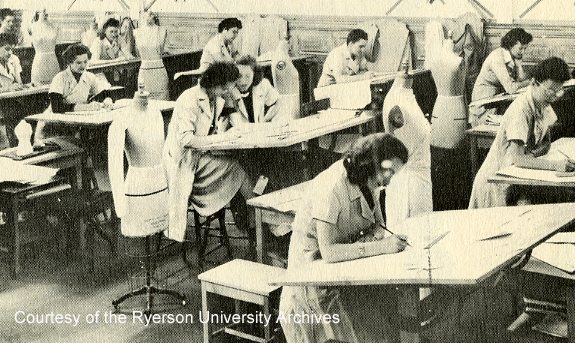
School of Costume Design – dressmaking, pattern making, draping, and designing
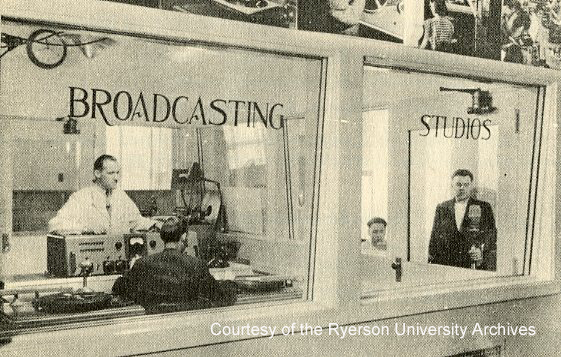
School of Electronics – radio communications, radio and appliance servicing, industrial electronics, electronic laboratory practice, marine operating, announcing and production
School of Food Technology – commercial cooking and commercial baking
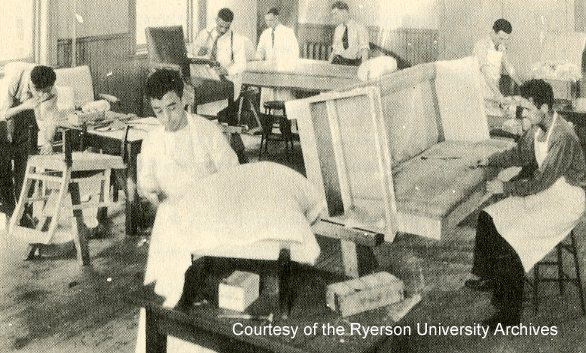
School of Furniture Crafts – cabinetmaking, upholstering, wood finishing, and furniture design
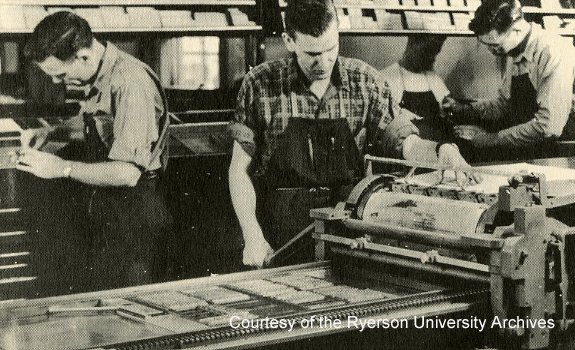
School of Graphic Arts – hand composition and typography, letterpress presswork, linotype, intertype, monotype, photo lithography, offset presswork, printing design and layout, bookbinding, and journalism
School of Jewellery and Horology – goldsmithing and gem setting, watch making and repair
School of Industrial and Mechanical Technology – general mechanical, tool design, tool and die making, mechanical drafting, and welding
School of Photography – portraiture, commercial, and industrial
With the exception of the School of Jewellery and Horology, all of these schools evolved into programs offered by Ryerson today.
Extension Courses
Ryerson also offered 2 extension courses at the trade level. They were Men’s tailoring, and Women’s tailoring. The Admission requirements were a grade 10 or equivalent education and you had to be at least 16 1/2 years old. Course fees were the same as the Technology courses.
Women’s Tailoring
The extension department evolved in to the present day G. Raymond Chang School of Continuing Education. The school now offers 88 certificate programs, and accreditation courses for 10 professional institutes and associations.
Department of Education supervised courses
Housed at Ryerson were courses offered by the Department of Labour and the Department of Health, which varied in length from 2 months to 9 months. Admission requirements, course of study, standards of attainment, and final exams were the responsibility of the sponsoring department. The Department of Education supplied the staff and supervised the courses. All the courses were trade courses. They were:
Department of Labour
Apprenticeship courses in building trades, millroom, and motor vehicle repair trade (2-3 months)
Barbering (9 months)
Barbering
Hairdressing (9 months)
Cosmetology
Stationery Engineering (9 months)
Department of Health
Certified Nursing Assistant course (9 months)
Courses for the University of Toronto
Offered by Ryerson, in co-operation with the University of Toronto, were 2 courses for their students.
Occupational Therapy – printing and woodworking
Institutional Management – commercial cooking
To learn more about Ryerson’s beginnings drop by Archives and Special Collections on the 4th floor of the Library in LIB 404
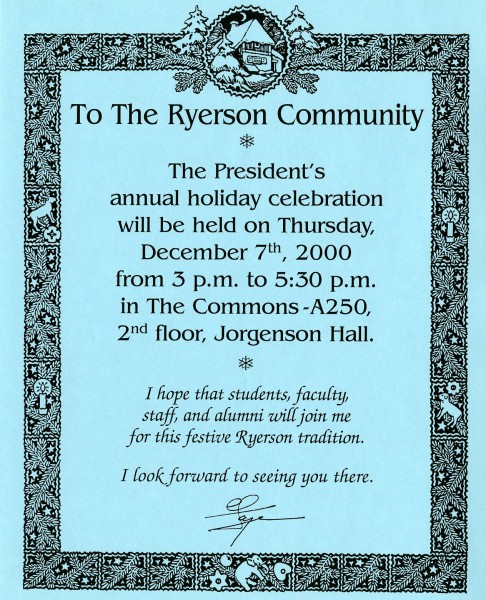
As 2014 winds to a close, we looked into the Archive’s collections to see how the holidays were celebrated in days of Ryerson past.
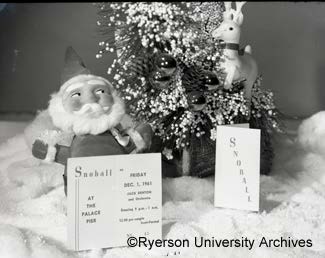
Snoball, 1963
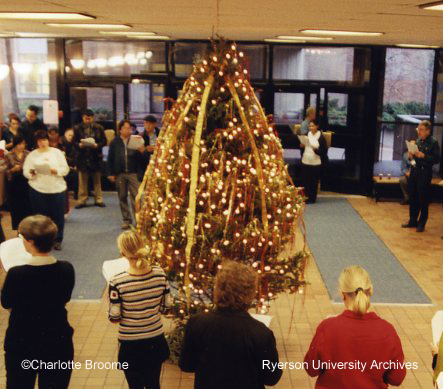
Jorgenson Hall carol sing, December 2002
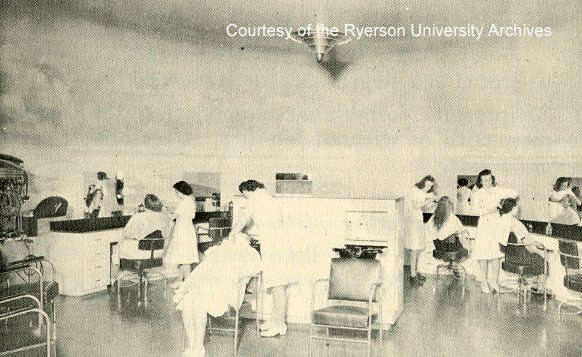
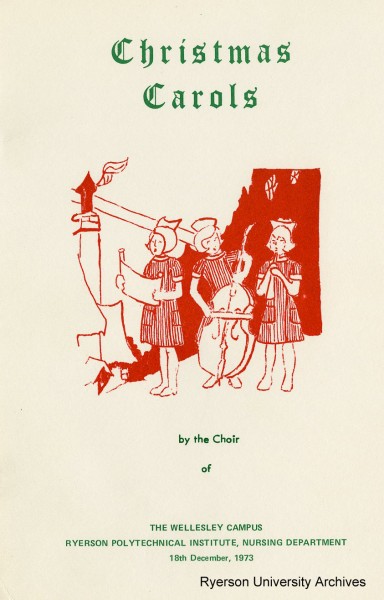
In 1973, The Wellesley Hospital School of Nursing amalgamated with Ryerson’s School of Nursing.
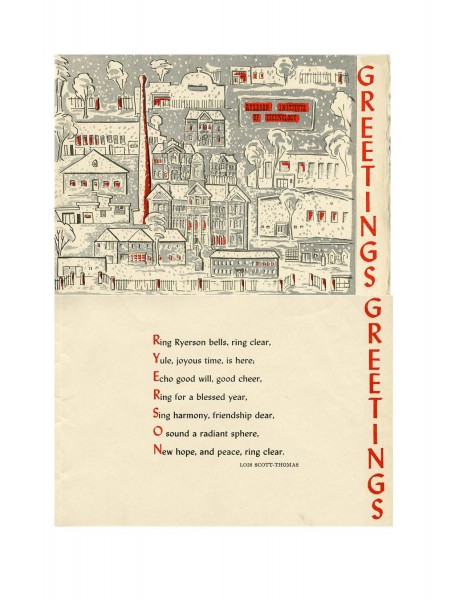
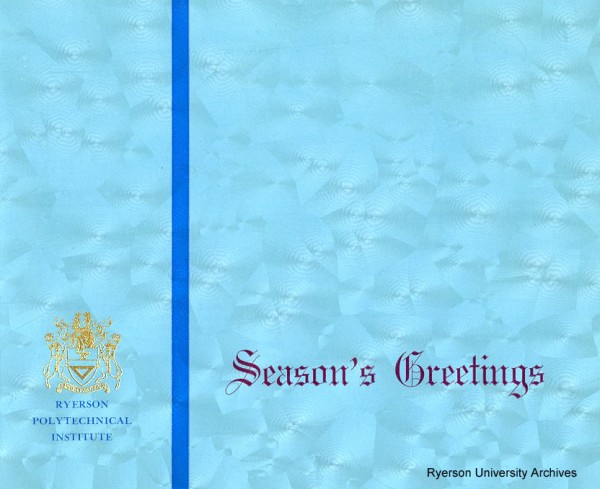
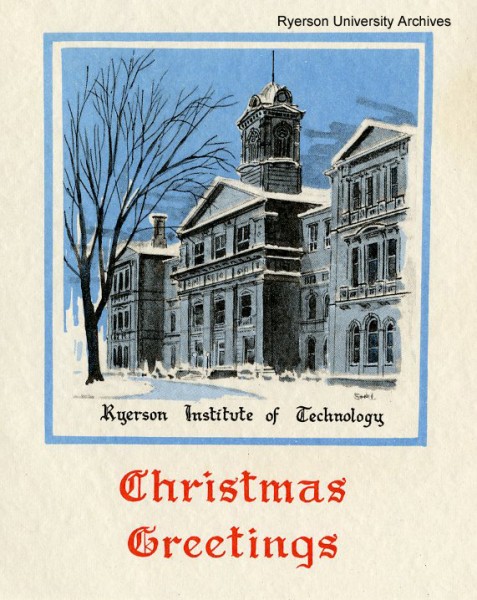
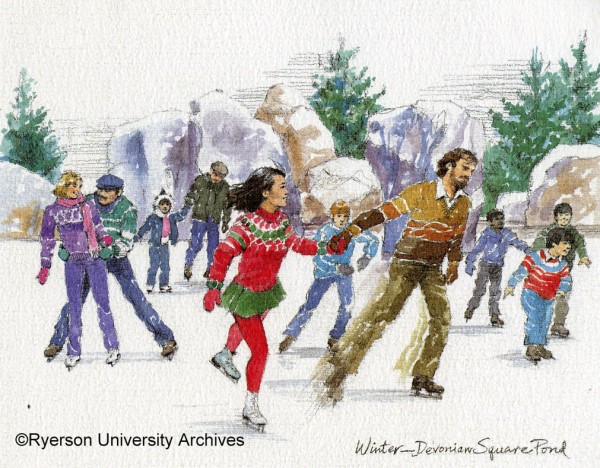
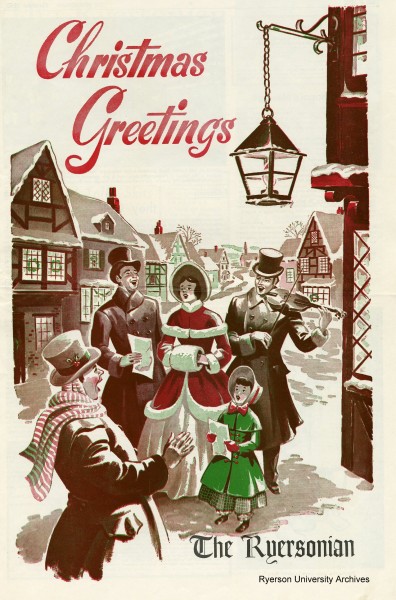
Here are a selection of Holiday cards mailed out by the School.
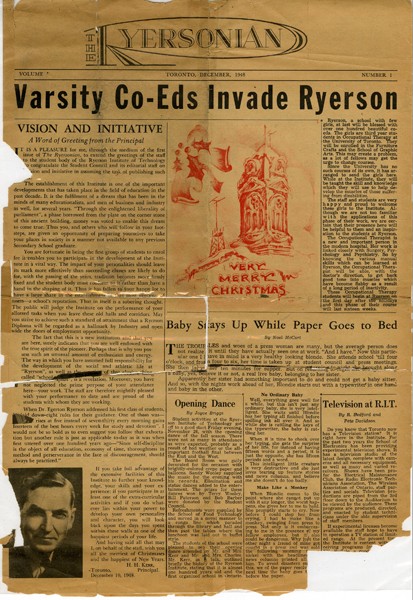
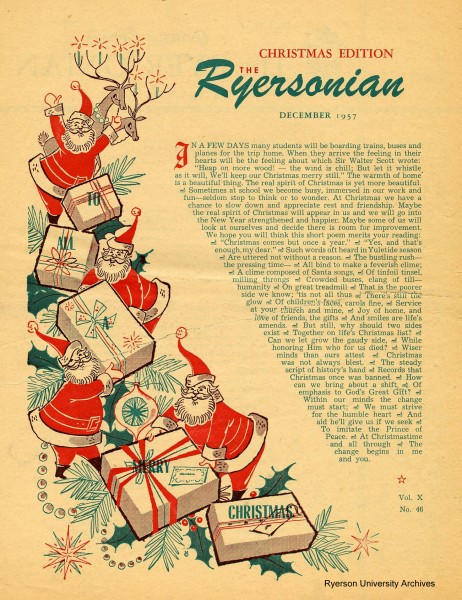
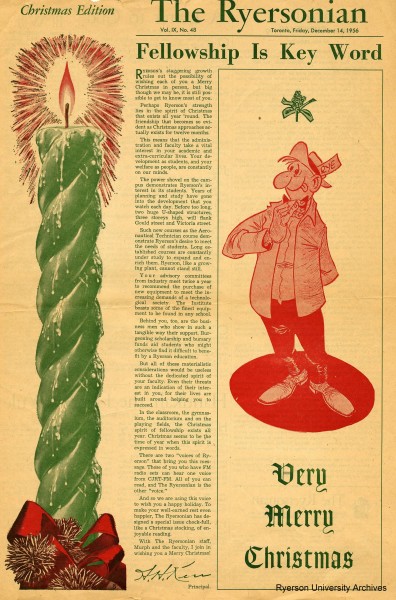
A series of Ryersonian Newspaper covers from years past.
The staff at the Ryerson Archives & Special Collections wish everyone the Happiest of Holiday Seasons and best wishes for the New Year. Hope to see you in 2015.
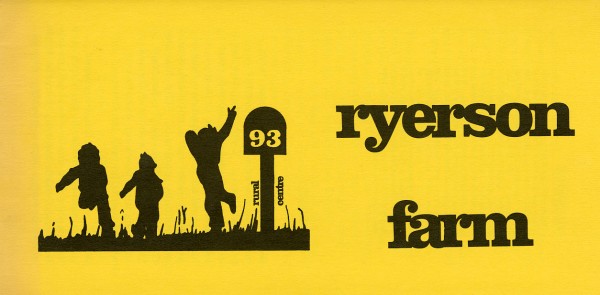
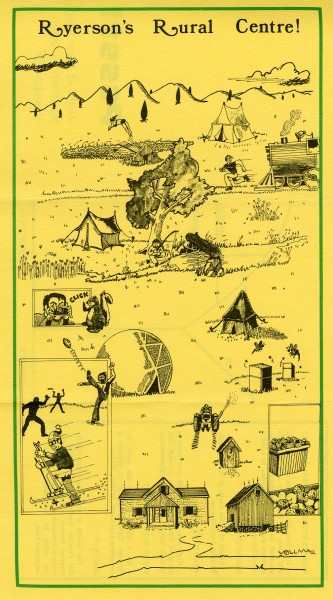
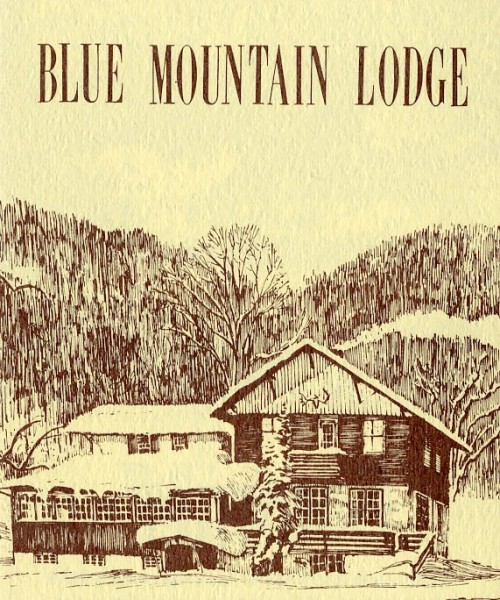
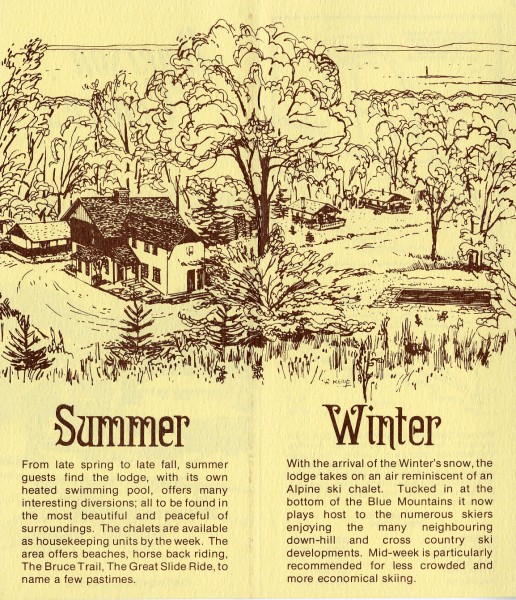
Did you know that Ryerson used to have a Rural centre and a ski lodge?
The Ryerson Rural Centre or Farm was located in Millbrook, about 19 km south of Peterborough. The 200 acre site was purchased in 1972 and was available for the Ryerson community to use. Activities included orientation, departmental seminars, and retreats. The farm house was equipped for over night rentals and cost an economical $2 per night. It was sold in 1980.
The Ryerson Blue Mountain Lodge was located just outside of Collingwood. The 7.5 acre resort, which was purchased in 1975, consisted of a central lodge, 4 chalets and boasted an outdoor heated pool. It was also available for booking by all members of the Ryerson Community and was accessible year round. It was sold in 1983.
To learn more about the farm and the lodge or to find out things about Ryerson you might not have known stop by Ryerson Archives & Special Collections located on the 4th floor of the Library in LIB404